Welcome to Life at the Holman's.


This blog is my way of sharing some of my thoughts and ideas. As the children age and become independent, I find myself with an empty space. Years of homeschooling and child-rearing focus has transitioned to more time to focus on the things I enjoy. One of my greatest pleasures is cooking. I enjoy making sweet treats for my family and friends and preparing meals that bring a smile to my husband's face. I like finding new ideas that help to make life easier. Enjoy!
Showing posts with label recipe tips. Show all posts

Saturday, March 3, 2018

The Perfect White Rice in an Instant Pot

I have had my Instant Pot for about a month now and have found my favorite thing, thus far, to make in it...RICE!  It is so easy and has turned out perfect every time. 

In a previous post, I talked about making wild rice, but since then, I have made white rice several times and have decided that my IP is worth it just for cooking rice.  Being able to set it and walk away is wonderful.  It has worked every time to produce the perfect rice texture.  The original directions I used are found at Perfect Pressure Cooker Recipes.

Here is how I make Perfect White Rice in my Instant Pot:
Ingredients 
1 cup rice
1 cup water
¼ - ½ salt (optional)

Instructions

  1. Rinse the rice under cold water for a couple of minutes to wash off some of the outer starches. Drain it well.
  2. Place the rice, water, and salt (optional) in the Instant Pot.
  3. Close the lid and cook at MANUAL HIGH PRESSURE for 3 minutes. 
    After the 3 minutes, use the natural pressure release for 10 minutes and then finish with the quick release.
  4. Remove the lid carefully and fluff the rice.
NOTES:
  • Rice doubles as it cooks, so one cup of dry rice yields 2 cups of cooked rice.
  • You can increase the amount of rice just make sure you use equal rice to water ratio and rinse the rice thoroughly.
  • Jasmine rice is my favorite white rice.  It has a wonderful texture.  
  • I have made it both with the salt and without, and I don't see much of a difference.


Wednesday, October 5, 2011

What's for dinner? - Chimichangas, Yellow Rice and Re-fried beans!

Tonight's dinner was another dish from one of our favorite cuisines...Mexican!  We eat a lot of Mexican foods whether it be at home or out at a restaurant.  We recently tried a different Mexican restaurant here in town.  I decided to stray from my usual taco salad and try some chimichangas.  They were excellent! They were not the usual ground beef or chicken filled chimichinga, rather they were beef tip filled (tiny steak bites).  

Before we left, I talked to the waiter at the restaurant and asked how they get their chimichangas to stay together when they fry them. When I tried to make them in the past, the most difficult part was getting the tortilla to stay shut. He said that they actually have a basket that goes around the tortilla that holds it together.  Great!  Back to square one because I do not have that wonderful basket!

Anyway, we tried making chimichangas again tonight. We ended up with our own little Mexican restaurant. JJ had his typical cheese enchiladas, rice, and beans while Jason, Savannah, and I had chimichangas, yellow rice, beans and salad topping consisting of lettuce, tomato, sour cream, and homemade guacamole.  Mmmm!

Here is how we did it:

Homemade Chimichangas

Ingredients:
Chicken, Beef tips, or ground beef seasoned Mexican style
Tortillas (homemade or large store bought)
Mexican blend cheese
Toothpicks
Oil for frying
White melted cheese 
Shredded Lettuce
Diced Tomato
Sour Cream
Guacamole

Directions:
While the oil is heating, stuff your tortillas with a couple of spoons full of meat mixture and about 1 Tbsp. of cheese.  Tightly roll the tortilla tucking in the ends (early in the rolling process) so that the stuffing does not fall out during the frying.  Take a toothpick and use it to close the side.  After all the tortillas are stuffed, then comes the difficult part.
Since I do not have the fry basket, I used 2 tongs to hold the tortilla shut. It is necessary to hold the tortilla shut for a while even though you closed it with a toothpick because it will expand and open up in the frying process. The toothpick only holds the middle so make sure your tongs are toward the ends.
Allow the chimichanga to fry until it is a light golden brown­­­­ turning it throughout the frying process.  Remove it from the oil and allow it to drian on a paper towel.

Chicken Chimichanga Filling
Ingredients:
Boneless Skinless Chicken Breast, cut into small pieces
½ packet of Sazon Seasoning from Goya
Green pepper, finely chopped
Yellow Pepper, finely chopped
Onion, finely chopped
½ tsp. olive oil
Chili Powder
Cumin
Garlic Salt
Pepper

Directions:
Sauté the peppers and onions in olive oil for 2-3 minutes in a cast iron skillet.  Sprinkle the mixture with chili powder, garlic salt, and cumin (just enough to add flavor).  Add the chicken pieces and about 2 tablespoons of water (to keep the chicken moist).  Sprinkle the sazon over the top of the meat, pepper, and onion mixture.  Allow it to fry for about 4-5 minutes until the chicken is cooked.  Do not overcook the meat or it will be dry.  Allow it to cool for a few minutes and then stuff the tortilla shells.

JJ requested that I make yellow rice instead of our traditional mexican (red) rice.  He wanted his meal JUST LIKE the one at the restaurant, and this particular restaurant happens to serve yellow rice!  I did a quick search online and found this recipe at ehow.com.  Here is the link to the exact recipe.

Mexican Yellow Rice

 1 c. rice
 2 c. water
 1 tsp. crushed garlic
 1 tsp. olive oil
 1/2 tsp. Sazon seasoning by Goya
 1/2 tsp. turmeric  (I used ginger.)
 1/2 tsp. salt

Directions:
Add the oil to a sauce pan that is set on medium heat. Add the garlic, sazon, and tumeric (or ginger in my case) to the oil as it is heating. Brown the garlic slightly and then reduce the heat. Add the water and bring it to a boil.  Once the water is at a full boil, add the rice to pot, stir, and return it to a boil. When the rice and water has returned to a boil, turn the heat down to low and allow it to finish cooking. It is important to keep an eye on the rice and stir it occasionally.  If the water boils out and your rice is not completely cooked, add a little bit of water (about 1/4 cup at a time) to keep it from sticking and to give it more time to cook. The recipe says to allow it to cook for 25 minutes, but I typically only let long grain rice cook for 18-20 minutes.  I just check it and see if it is cooked all the way through and soft.

As mentioned above, I used ginger instead of turmeric.  I had Savannah do a bit of research to find out exactly what turmeric was, and she found it to be an Asian plant that is in the ginger family.  That was good enough for me!  I replace the required turmeric with just a dash of ginger (I didn't want to over do it!).  It worked.  The rice was great!

With everything done, it was time to put the plates together...chimichanga smothered with melted white cheese, refried beans with a bit of shredded cheese sprinkled on top, yellow rice, lettuce, tomato, sour cream, and guacamole. Here are a few tips:
  1. Do not over fry the chimichanga.  They will be extra crunchy if you do. (speaking from experience)
  2. When you are draining the chimichanga, turn it on it's end to allow some of the extra oil that made its way inside to drain out.  
  3. You can also add a bit of fire to the meat stuffing by putting in some hot chilies or sprinkling it with red pepper. 
  4. If you do not have time to make refried beans from scratch, you can use a can of pinto beans.  Heat 1 tsp. of bacon grease in an iron skillet.  Pour in the whole can of pinto beans (juice and all) and use a potato masher to mash up the beans while they are "re-frying." Lightly sprinkle the beans with chili powder.  Add water to the mix if they are getting too dry and sticking to the skillet.  Savannah actually made the beans tonight. Using the canned pintos turned out much better than the "pre-smashed" variety of canned refried beans.  

Monday, September 26, 2011

Homemade Butter Pecan Syrup

We recently ate at one of the local restaurants that served butter pecan syrup with our pancakes. Everyone in the family thoroughly enjoyed it so we decided to try and make some syrup of our own.  I searched online for a recipe and here is the one that we tried.  The only thing I changed was that I only boiled the syrup for about 4-5 minutes.  We just didn't want to wait for the full 10 minutes, but it still turned out great and thick enough for out taste.

JJ stopped in the middle to let me take a quick picture!
Here is what is left!

I only made a half recipe which turned out to be just enough (with a little left over) for our family of four.

Friday, October 22, 2010

Pumpkin Puree

Homemade pumpkin puree is a fairly inexpensive way to enjoy some very tasty goodies.  A few years back, I decided to make my own pumpkin puree for the first time.  I purchased 2 medium size and one large pumpkin for $5 from a local farmer who was selling them in a plaza parking lot.  I took them home, and began preparing them for pureeing.  Of course, we carved all 3 pumpkins before cutting them up for cooking!
2006 pumpkins....soon to be puree!
This year, I decided that I wanted to make my own puree again.  After all, it is not very hard, and the end result is excellent tasting free pumpkin puree.  I began researching how to puree pumpkin.  In 2006, I cut the pumpkin into strips, peeled it, and then cut it up before cooking.  I cooked the pumpkin in the oven on 350 until it was tender.

I decided to "google" how to puree pumpkin and see if there was another way I could puree it (and to help refresh my memory as to how I had previously pureed).  I found some really good illustrated directions at thepioneerwoman.com.  Here is the link to the directions.  She also had a lot of really beneficial ideas.  First, the use of freezer bags that can easily stack and take up less room in the freezer was a great idea for me.  Last time, I used the 16 ounce containers. It works as well, but it does take up more room.   Also, turning the opening of the bag out before putting pumpkin in it really helped cut down on mess when you try to seal the bag.  I did not have the mess around the rim of the bag from putting the spoons of pumpkin in.

I decided to give the Pioneer Woman's method a shot.  Here is what I did this time:
Step-by-step Pumpkin Puree 
  1. Choose your pumpkin.  I chose a larger pumpkin that was on sale at my local supermarket for $3.33 each.  
  2. Preheat your oven to 350 degrees.
  3. Use a butcher knife to cut out the vine topper.  
  4. Let your kiddos remove the "slim" and the seeds from inside.  Save the seeds for making toasted pumpkin seeds!  
  5. Cut the pumpkin in half from the stem to the bottom and around.  Use a metal spoon to lightly scrape all the goo from the inside.  
  6. Cut each pumpkin half into strips and lay the strips on cookie sheets for baking.  
  7. Bake for 45 minutes to 1 hour until your pumpkin is tender.  
  8. Remove from the oven and allow to cool for some time in order to be able to handle it easily.  
  9. Remove the outer skin by peeling it away.  
  10. Cut the cooked pumpkin into pieces and put it in a blender.  
  11. Puree until smooth.
  12. Put 1 cup of pumpkin in each quart freezer bag.  I used a scale to weigh 8 ounces in each bag.
  13. Flatten the bag to remove most of the air and seal the bag.  Lay flat to store in the freezer.
Here is what we ended up with:


16 - 8 ounce bags of pumpkin puree


Seeds for drying


Toasted Seeds - take about 2 Tbsp. melted butter
 and top with salt.  Bake for 15-25 minutes (depending on your oven)  until golden brown
 Tips:
  • While the above method is good and worked just fine, I have to say that I think the other way was maybe a little easier in the long run.  When I peeled the pumpkin and already had it cut into chunks, it seemed to cook faster and more evenly.   
  • I added about 1 Tbsp. of water to a full blender of pumpkin to help it along in the pureeing process.  It just seemed to blend smoother.  
  • 1 full blender of pumpkin chunks for my blender yielded about three 8 ounce servings.
  • I tried to use a food processor (small one), and it did not work very well.  The small food processor was taking too long.  I decided switch to my blender so that it did not take forever to finish.  It also seemed to give a more even consistency.
  • I froze the pumpkin in the 8 ounce portions because that is the amount of half of a small can of pumpkin that you buy at the store.  When I make a recipe, I usually only need 1/2 of the can.  This way I have just what most of my recipes call for.  
  • I placed my completed bags in stacks in my refrigerator freezer in a 9X13 pan to do the initial freezing so that they would freeze flat.
  • The 16 ounce sour cream or butter containers work well for storing the pumpkin in the freezer as well.  They hold the same amount as a small can of pumpkin.
  • I had no idea that cooked pumpkin actually tastes pretty good (sort of like a cross between a squash and a sweet potato) when it is baked.
That is about it.  I look forward to sharing some of the things that we use our pumpkin for in the near future.

As far as cost, here is the break down.  We paid $3.33 for the pumpkin (about 12.5 pounds) and $1.00 for the freezer bags (40 bags for $2.50).  Of course, we did have the propane for our stove, but I have no way of figuring that in. I know that it was not much though.  So...for the extras in gas, we will round up and say that we made 16 - 8 ounce servings of pumpkin puree for roughly $.38 each.  That would result in a can of pumpkin costing about $.76, and  homemade is healthier without all the additives and preservatives.  Plus...the kids had a great time getting slimy!

Then, there is my least favorite part...the clean up!  I would never win the award for "the clean cook."  I like to have a clean kitchen when I start, but I sure seem to get it messy when I am cooking!


1 Small Can Libby's Pumpkin = 15 ounces or 2 of my frozen baggies.  If you typically use a whole can of pumpkin, you can either a freeze a full 15 ounces in one bag to save on bags, or you can fill a sour cream bowl (the kind you reuse from the store when they are empty).  The sour cream/small butter bowl filled almost to the top will equal a small can of Libby's pumpkin (don't fill to the top because you have to have room for freezing and expanding). 

Saturday, October 16, 2010

Pears, Pears, Yummy Pears!

Fall brings the cooler weather, the falling leaves, and the ripening pears.  On the back edge of the field connected to the east of our property, there is a field that has a couple of pear trees.  Three years ago when the ranch foreman first told us about the pears, we were able to stock up on loads of pears.  The tree was literally sagging with sweet, juicy pears.  We cut and froze pears, baked pear pies and pear crisp, and ate all the fresh pears that we could ever want.

The following year, we went back hoping to have the pears again.  There wasn't a single pear on the tree!
A couple of weeks ago, we knew that it was pear time again.  We did not have much hopes of having any good pears to eat, but we decided to make the mile trek through the fields to find out.  We started down the winding path of tall grass and weeds.  There were definitely pears this year, but they were still a little bitter and not quite ripe.  We waited a couple of weeks more and our efforts were rewarded.  Jason took our weed trimmer out and semi-cleared us a path so we at least did not have to walk through waist high grass. I also have to add that the mile sees to be much when you start back with a backpack full of pears!

The pears are still not quite as sweet or abundant as they were the first year, but they are pretty good.  So far, we have made some dried pears, pear crisp, poached pears (we did not care for poached pears much!), and cut up fresh pear snacks.  We have also put up about 7-8 quart bags of bears that we will later use for cooked pears over biscuits or pancakes.  I can also use the frozen pears in pear pie.
Dried Pears
We are headed back to the pears today with our truck.  Jason went out today to cut out some of the branches to make the path for the truck a little less "scratchier."  Hopefully, the pears will be fully ready to be picked and preserved!

Dried Pears
Thinly Slice pears and dip them in lemon juice.  Use a dehydrator according to manufacture directions.  It took our dehydrator about 4-5 hours to make the dried (almost crispy) pears.  You can use the pears for a snack or you can store them an rehydrate them for use later in a cake, pie, etc.  I have to say that I have never rehydrated the pears so I can not offer any personal experience/suggestions for that.  We always just eat ours for a snack...they would never last long enough at our house to use at a later date!

Pear Crisp
4-5 ripe Pears
1/4 cup quick cook oats
1/8 cup flour
1/2 cup brown sugar
1/4 tsp. cinnamon
1/2 to 3/4 cup butter (the more the better, right!)
Dash of nutmeg (optional)

Slice the pears (about 1/4 inch thick) and place them in a 9 inch baking dish.  Mix the dry ingredients together in a bowl.  Cut the stick of butter into pieces and use a pastry blender, fork, or 2 knives to cut the butter into the dry mixture.  Pour the mixture evenly over the pears.  Bake at 350 degrees until browned.  Serve hot with vanilla ice cream!

Sunday, October 3, 2010

What's for Dinner? - Hot Spiced Apple Cider

When we were at Wal-Mart, I saw a display of the gallon jugs of apple cider.  I asked the kids if they had ever tried it.  When they said "no," we decided it was time to give it a try.  We made a spiced hot apple cider for our Fall Fun Day this past week.  It was delicious.  Here is what we did:

Hot Spiced Apple Cider
1 quart apple cider
2 cinnamon sticks
1/8 tsp. ground cloves
1/8 tsp. orange extract flavoring
Dash of nutmeg
2-3 Sweetener packets to sweeten (honey or sugar works also depending on your preference)

Mix all the ingredients together in a pan.  Heat over medium heat until boiling.  Turn off the heat and let it steep in the pan with the lid on.  We made ours a couple of hours in advance to let the flavors set in.  Serve hot.

Tips:

  1. If you are planning on needing to keep your cider warm for an extended period of time, you can use a crock pot to keep the drink warm for several hours without having to worry about it scorching on the stove.  
  2. It is also fun to warm and drink the cider by the camp fire on a cool evening.  We just set up our campfire with a place to put our pan.  It stayed hot and ready to drink!  
  3. The longer our cider sat, the stronger the flavor became...so, you may need to add unseasoned cider to tone it down after a while.
  4. Orange juice will work in substitution for the orange flavored extract.  You will need to use more orange juice because the orange juice is not as strong in flavor as the extract.  I have also heard of people using pineapple juice, but I have not tried it yet.

Sunday, September 5, 2010

What's for Dinner - Homemade Apple Pie

I love the smell of a fresh baked apple pie with the apple and cinnamon scents that flow through the house.  It is a great fall smell.  Yesterday while JJ and I were shopping for our Labor Day meal, we found some Gala apples that were on sale.  JJ and I decided that we needed an apple pie to go with our home made ice cream so we bought a couple of bags of apples with the promise of fresh baked apple pie for our cook out.

While there are many different recipes to make an apple pie, I thought I would share the way we make ours here at the Holman house with pictures to follow our adventure.
First, you need to gather the ingredients:
2 cups Flour
1 tsp. Salt
2/3 cups shortening or real butter
6 table spoons of ice cold water
5 Medium apples peeled, cored, and sliced
1 stick REAL butter
about 1 cup sugar
approximately 2 tsp. cinnamon

We begin by mixing the flour and salt together in a large bowl.  Make sure you do not pack down your flour in your measuring cup or you will have too dense of dough which will come out tough.

Next, you add your shortening or butter.  If you are using shortening, make sure it is very cold.  I usually put mine in the refrigerator for some time to make sure it is hardened. Pie crust is a pastry so when you use the very cold shortening or butter, it helps your crust take on a flakier texture.  It allows the fat to stay together when you cut it into your flour leaving "air pockets" when baking.  The idea is that the small solid pieces of fat that are left after mixing will melt under the baking heat.  In effect, it leaves the air pocket behind allowing for a flakier crust.

Cut in your shortening/butter into your flour with a pastry blender until your shortening/butter pieces are pea size or less.  Do not overwork your shortening or you will defeat the purpose of leaving the tiny chunks for air pockets.

Next you add the ice cold water.  When I begin to make the pie crust, I put water in a measuring container with ice cubes to ensure it is really cold. Mix in the water.

This next trick is a big plus for me.  I do not necessarily like the mess of first mixing my pie crust.  So, I actually watched a Martha Stewart video one time and discovered a way to avoid the initial "kneading" of the dough.

Take plastic wrap and spread a large piece on the counter/table.
 After you have the water slightly worked into the dough (where it is still crumbly), pour the contents into the center of the plastic wrap.  Begin folding each side of the plastic wrap into the center and pressing downward.  Continue this process alternating the sides of the plastic wrap until the dough is mixed well.  This brings up another point...when making pastry doughs, another trick to creating flaky layers is to fold your dough over and press down when you are kneading it.

You fold a side, press it down.  Then, take another side and fold it in, repeating the process until the dough looks smooth. This creates "folded" layers of dough.


Again...do not over work your dough, or you will have a tough pie crust.


Ready for the fridge
Next, wrap the dough tightly in your plastic wrap and place it in the refrigerator to allow the worked dough to firm up.


After the dough has set in the refrigerator for a while, take it out and divide it into halves.

The dough actually forms layers


Roll the dough out in a circular form large enough to fit into the pie pan and allowing a slight edge of dough to hang over the top edge of the pan. Make sure you flour your surface well and check it occasionally while you are rolling it out to prevent it from sticking to your counter.

Now, you use your prepared apples pieces to fill your pie pan.  So I will take a break and go over that step.

For the apples, we use our apple peeler, corer, slicer tool.  It is a great tool that we found for a few dollars at a thrift store recently.  It was well worth the purchase...especially if you are one to "put-up" apples in the fall whether it be canning apple butter or freezing apple slices.  This machine takes off the skin, drills through the  core, and leaves you with nice clean even slices of apple.  It also works for pears.  We tried it our on one of the pears from our pear trees in the back field.  While they are not quite ripe enough yet, we were able to see that this tool will work great when we are ready to "put-up" pears this fall.  It beats having to do it with a paring knife!

Back to the pie:


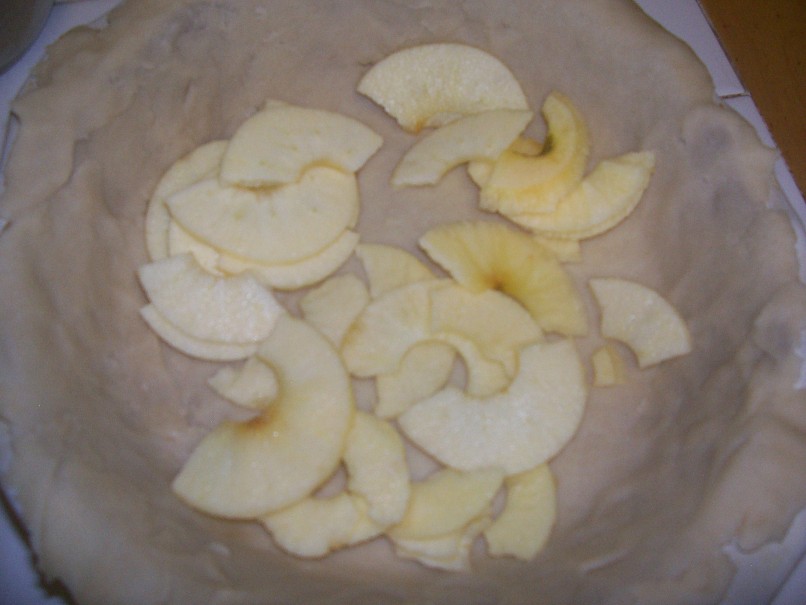
Place the peeled apples in the bottom crust. We used 5 medium apples for our pie.

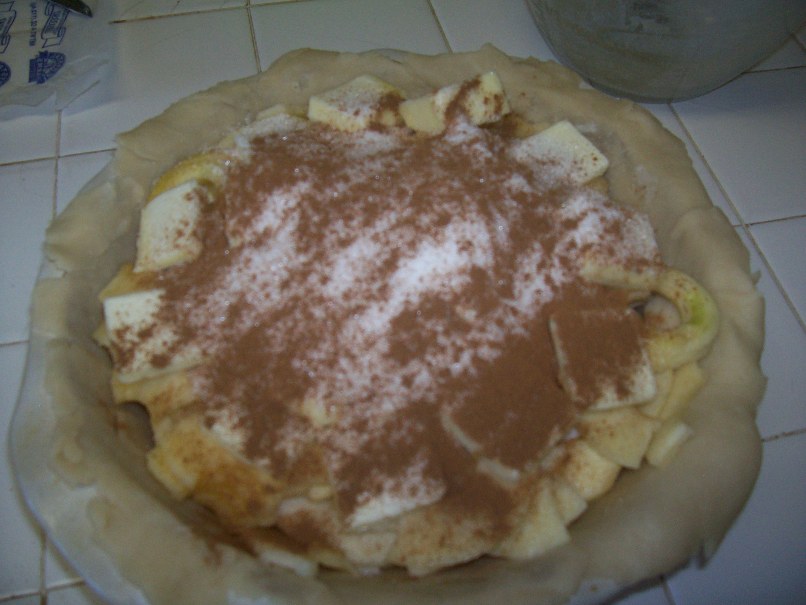
Top the apples with 1 stick of real butter cut into slices.  Add about 3/4 cup of granulated sugar and sprinkle the top with cinnamon.


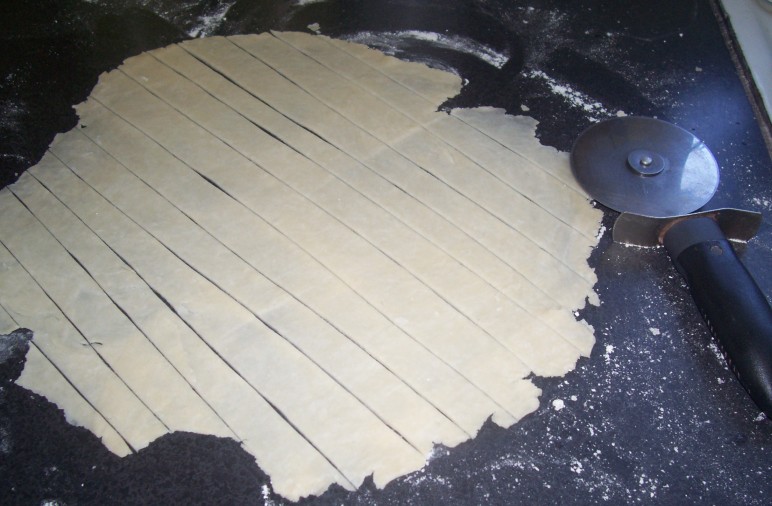
Roll out your remaining half of pie crust.  At this point you can either make a solid topped pie crust and just lay the whole crust piece on top of the pie and press together, or you can make a fancy lattice work topper.  I found a website that has great directions for making a lattice crust (Simple Recipes Lattice Pie Crust Directions).  We like the look of our lattice pies.  I use a pizza cutter to make my lattice pieces. It is quicker and usually allows me to get them more even and straighter.

Next, sprinkle the top of the pie lightly with sugar and bake at 350 degrees until it is light golden brown.

Serve hot with vanilla ice cream!

Saturday, August 28, 2010

What's for Dinner? - Easy Buttery Crunch Chicken

Allrecipes.com is a wonderful source for cooking ideas and questions, finding unique recipes, and sharing your own personal experiences.  There is a great question and answer forum that I have used many times in the past to find answers to various questions.  If you open an account, you can also save recipes that you like or want to try in your own personal "cookbook" area.  


The following recipe is a quick and easy dish that I discovered on allrecipes.com.  It is called Famous Butter Chicken on their site.  Everyone in my family loves when I make this recipe, and it can be fixed with very little time or effort on my part.


Famous Butter Chicken - Easy Buttery Crunch Chicken
Ingredients
  • 2 eggs, beaten
  • 1 cup crushed buttery round cracker crumbs (Ritz style)
  • 1/2 teaspoon garlic salt
  • ground black pepper to taste
  • 4 skinless, boneless chicken breast halves
  • 1/2 cup butter, cut into pieces
  • Directions
  1. Preheat oven to 375 degrees F (190 degrees C).
  2. Place eggs and cracker crumbs in two separate shallow bowls. Mix cracker crumbs with garlic salt and pepper. Dip chicken in the eggs, then dredge in the crumb mixture to coat.
  3. Arrange coated chicken in a 9x13 inch baking dish. Place pieces of butter around the chicken.
  4. Bake in the preheated oven for 40 minutes, or until chicken is no longer pink and juices run clear.

Tips:
  1. I always make more than the recipe calls for (usually 6-8 chicken breast halves for the 4 of us).  It doesn't seem to go very far no matter how much I make.  JJ absolutely loves this chicken and will eat it until it is gone if we let him.
  2. I use real butter for this recipe.  I have not tried margarine, but I believe it will work as well.  We just like the saltier real butter flavor.  
  3. The garlic salt is not detected in this recipe.  So, if you have an aversion to garlic, don't worry because the flavor is not strong in it.
  4. Pour the remaining cracker crumbs over the chicken before adding the butter pieces just to add the extra crunch and prevent wasting the leftover cracker crumbs.
  5. Lay the pieces/slices of butter directly on top of the chicken.  I usually place 2 slices on each piece of chicken (or one if the pieces are small chicken tender size cuts).  This seems to distribute the butter more evenly.

Sunday, August 1, 2010

What's for Dinner? Gyros, Homemade Pitas and Tzatiki Sauce

Greek anyone?  A gyro is a Greek dish traditionally made of lamb meat (sometimes other types of meat such as pork) that is cooked on a spit, sliced, and served in a pita pocket topped with various toppings of choice.  At our house we do not have the big spit to cook a rack of lamb, so we improvise.  We use a roast (because it is much cheaper and with the proper seasoning and taste very similar) that has been very thinly sliced/shaved in to strips about 2 inches long.  A couple of hours before you cook the meat, sprinkle the meat with the following seasoning mixture and place it in the refrigerator.

Gyro Seasoning
2 tsp. dried oregano
2 tsp. salt
1 1/2 tsp. onion powder
1 1/2 tsp. garlic powder
1 tsp. black pepper
1 tsp. dried parsley flakes
1 tsp. paprika
1/2 tsp. ground cinnamon
1/4 tsp. ground nutmeg
1/2 tsp. thyme

Combine all the ingredients and store in an air tight container.

Pan fry the meat on high heat in about 1 tsp. of oil until cooked.  You can add as much seasoning as you like to the meat.  It is more of a taste preference.  I also like to sauté bell peppers and onions in another skillet to have as an additional topping.

Second, you will need pita pockets.  While we prefer the homemade variety, you can also purchase pita pockets at most local grocery stores.  For those adventuresome cooks, here is the pita pocket recipe we use.

Homemade Pita Pockets
1 1/8 cup warm water (110 degrees F)
1 tsp. white sugar
1 1/2 tsp active dry yeast
3 cups all-purpose flour
1 tsp. salt
1 Tbsp. vegetable oil

Directions:
Combine warm water, sugar, and yeast in a bowl and allow to stand for 10 minutes to allow time for the yeast to activate.  Mix in flour, salt and oil.  Kneed the dough until a smooth dough is formed.  Allow to rise for 1 hour or until doubled.  

Turn dough onto a lightly floured surface and gently roll and stretch the dough into a 12 inch rope. With a sharp knife, divide dough into 8 pieces. 

Roll each into a smooth ball. With a rolling pin, roll each ball into a 5 to 7 inch circle a little over 1/4 inch in thickness.  Be careful not to work with the dough too much or it will not "puff" and make the pocket area in your pita.  Set rolled pitas aside on a lightly floured counter top and cover with a towel. Let pitas rise about 30 minutes until slightly puffy.

Preheat the oven to 500 degrees F (260 degrees C). Place 2 or 3 pitas on a wire cake rack or cookie rack. Place cookie rack directly on oven rack. Bake the pitas 4 to 5 minutes or until puffed and the tops begin to brown. 

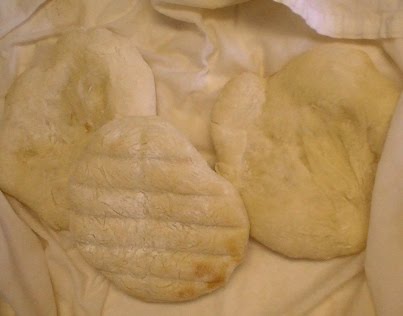
Remove from oven and immediately place pitas in a  cover them with a damp kitchen towel until soft. (Take a clean dish towel and put it under the water briefly to get some of the towel wet.  Then make sure you wring it out and leave it just slightly damp.  Lay it out on the table and as you finish each batch of pitas, open the towel and place the new pitas in the stack!) 

Once the pitas are softened, either cut them in half or split top edge for half or whole pitas. They can be stored in a plastic bag in the refrigerator for several days or in the freezer for 1 or 2 months.

Finally, all you need is to prepare your toppings.  We like lettuce, tomatoes, melted and shredded cheese, and Tzatkiki.  One of the items that my garden has decided to produce in abundance this year is cucumbers.  Tzatkiki is a Greek cucumber sauce that is very easy to make and a great way to use those extra summer cucumbers.

Tzatkiki Sauce
16 ounces Plain (not vanilla) yogurt
1-2 cucumbers peeled, seeded, and finely chopped or grated
1 garlic clove, minced
1 Tbsp. fresh parsley
1 Tbsp. Fresh lemon juice
Salt and pepper to taste

Combine all the ingredients and allow to sit for a couple of hours before serving.


Tips:
  1. When slicing/shaving your roast, slice it partially frozen.  A good sharp knife will slide easily through the meat and the mead is more solid so it does not "give way" while you are slicing it and enables you to get a thinner slice.
  2. If your cucumbers for the tzatkiki are very "liquidy," you may need to drain the cucumbers on a paper towel to get some of the extra moisture out.  If not you will have a very watery sauce.  
  3. Also, I do use the dried parsley for my tzatkiki.  I just sprinkle about 1/2 tsp. and stir it it.  
  4. Mint and nutmeg are two other seasonings that are commonly used in making the gyros.  However, we do not add these seasonings because of taste preference.  Just another idea to help change up your flavors if you are particular fond of the mint and nutmeg!
  5. You can make the pita pockets a little healthier by substituting some of the flour with whole wheat.  However, my family does not like the texture of whole wheat so we only make the white unhealthy but good pitas.