Welcome to Life at the Holman's.


This blog is my way of sharing some of my thoughts and ideas. As the children age and become independent, I find myself with an empty space. Years of homeschooling and child-rearing focus has transitioned to more time to focus on the things I enjoy. One of my greatest pleasures is cooking. I enjoy making sweet treats for my family and friends and preparing meals that bring a smile to my husband's face. I like finding new ideas that help to make life easier. Enjoy!

Wednesday, June 30, 2010

What's for Dinner? - Chicken Enchilidas

I recently began looking through our recipes for something different to make.  So many times I find myself making the same thing over and over.  Sometimes it is because it is a dish that we are really enjoying, and we just can't get enough of it.  Other times I just "repeat" dishes for lack of time or creativity at the moment to come up with something new.  But probably the most frustrating times are those "I am hungry for something but don't know what it is" moments. Those are the times that I like to get out my recipe notebook and peruse through my recipes.


On this particular occasion, I found a recipe that I had not made in probably close to a year.  I decided to make Chicken Enchiladas.  Yes, once again I find myself gravitating to the Mexican dishes.  My entire family loves to eat Mexican, and it is easy and full of flavor making it a great anytime meal for us.  The following recipe is the way I usually make enchiladas.  We like this recipe especially well because we are partial to the white sauce on top instead of the red.

Chicken Enchiladas

Ingredients: 

  • 1/2 pound grated cheese
  • 12 tortillas
  • 3 cups shredded chicken (about 2 large chicken breasts boiled and de-boned)
  • 2 cups salsa
  • 2 cans cream of mushroom soup
  • 1 cup milk
  • 1/2 cup sour cream
Directions:


Mix the shredded chicken with 1 ½ cup salsa or enough to get the chicken fairly moistened.  In each tortilla shell, place about 4 Tbsp. of chicken and top it with shredded cheese.  Roll the tortilla tightly and place each prepared tortilla in a 9x13 pan and repeat until all the shells are used.  Mix cream of mushroom soup, ½ cup salsa, milk, and sour cream.  Pour mixture over the prepared tortillas.  Cover with foil and bake at 350° for 1 hour.  During the last 10 minutes of the baking process, remove the foil and add cheese liberally to the top of the enchiladas.  Return the pan to the oven and bake for remaining 10 minutes or until bubbly and lightly browned.  Remove from oven and allow to sit for about 5 minutes to set.  Serve with lettuce, chopped tomatoes, guacamole, pico de gallo, Spanish rice, and refried beans.


Tips:

  1. This last time I made the recipe, I added mild banana peppers to the top.  We had just picked our first peppers from our garden and wanted to give them a try.  I only put them on half of the dish since my son will not eat peppers.  They turned out very tasty and added a whole new flavor to the recipe.  
  2. I usually vary this recipe according to whatever I have on hand.  For instance, I do not always use 2 cans of cream of mushroom.  Sometimes, I will use one can of cream of mushroom and use extra sour cream to make up the difference.  Or, you can add extra salsa to the top and have a spicier sauce.  This recipe is fairly forgiving so you can play around with the ingredients.  
  3. We have tried a variety of cheeses with this meal.  While they all work great, I prefer the Monterrey Jack or Mexican blend cheeses.  They seem to add more flavor to the overall dish.  
  4. For those who do not like cream of mushroom, you can try a cream of chicken as a substitute.
  5. For a stronger Mexican flavor, add chili powder, cumin, garlic, and onion to the chicken while boiling.
  6. I have also used chicken broth instead of milk, and it works well also.  
One final note, I made this dish several years back for some friends that were visiting.  The wife had told me (while we were finishing up preparing dinner) that her husband could not stand sour cream.  We decided to leave the "sour cream" fact out of the equation when discussing dinner.  We continued with dinner, and he ate the enchiladas and liked them.  He never even noticed the sour cream.  I said this to say...give it a try.  There are many flavors added to dishes that you don't actually notice when used in combination with other flavors.  This recipe is very versatile and forgiving.  Go ahead and add your hot peppers if you want more heat in your dish.  Tweek the recipe to fit your needs! 

Wednesday, June 23, 2010

Yeah! I finally have my computer back!

Yeah!  For the last 6 days, my laptop has been getting "cleaned." (I got my computer back on Monday.  I began this post then.) While I was able to use Jason's computer, it was nothing like having my own with my own settings, bookmarks, etc.  It is amazing how much life in general revolves around computers. Everytime I had a question about something or wanted to check on the weather, I would run to my computer (that wasn't there) to do quick look-up.  But, Best Buy Geek Squad now has my computer cleaned up and running smoother and faster!

I have just started working at our new Best Buy store that is grand opening this weekend in Stillwater. Jason has decided to go full-time as a handyman in this area.  He has been working at it for several weeks on just part-time basis, but we both decided it was time to go full-swing into self-employment.  So, I talked Jason into letting me take a job at Best Buy in order to supplement our income for the next few months until the business is built up.

I was also looking forward to getting outside of the house for a bit each week.  Little did I know what I was asking for!  For the last 2 weeks, we have been in training.  It has been intense.  I have put in about 40 hours a week which may not sound like much to some, but I haven't worked outside the home in 10 years!  (I have a much better appreciation for working mothers.)  I had a lot to do before I took another job, and now I have a job and all the rest.  However, I have 2 great kiddos that help tremendously around the house, and a husband who has really picked up my slack these last couple of weeks.  They have ALL been patient with my grumpiness,too!  I come home at night and am so numb that I just want to sit.  After a full night of sleep, I am still tired...ugh!  I have noticed in the last couple of days though that I am starting to get used to it and finding my self getting back to normal.  Next week, we will have more "realistic" schedules, and I will only be working 18 hours.

I do have to say that the employees at Best Buy are definitely trained in their departments.  While I still do not know everything, I can tell you the differences between various TV's, MP3's, LED's, LCD's, dSLR's, GPS's, and about a hundred other acronyms.  (Best Buy loves acronyms!) I will be working as the sales operator and will be taking phone calls and working in the customer service area.  Therefore, I have taken so many department tests these last 2 weeks that I brain is on overload.  I have to be certified in all the departments where sales take place and take the "beginning employment" tests for a grand total of 15 tests. Only 2 more tests to go!

The classes and their tests are all done on the computer through something called learning lounge.  It was fun the first night I had to bring my homework home.  I made a big deal of it with the kids and told them that they couldn't let me do anything until all my homework was done!  However, I haven't had to read and study for tests since....oh....1998!  Wow!  I felt like I was back in school with a deadline for having all my assignments completed.  (At least I am paid for this school!)  With that said, I am now an official certified Best Buy employee.  I have my "blue shirt." I am looking forward to our opening!

Well, this post has literally taken me 3 days to finish.  I hope to get back in the swing of things here at the house within the next week.  Summer school, laundry, house cleaning, etc.  We have actually only done our summer "fun school" one days in the last week.  Now that everyone is adjusting, things can become more normal (if we can remember what normal was)!

Tuesday, June 15, 2010

ATTACK OF THE CRAWDAD!

Yesterday it rained almost all day.  The roads were extremely muddy and the yard resembled a water park in some areas.  We spent the day inside which was good because both of the kids have swimmer's ear and needed to take a break from their swimming pool.  We decided to watch a movie.

The crawdad tank is next to the television so we unplugged the filter to get rid of the extra noise.  We finished our movie and went to bed soon afterwards.  JJ was having a hard time sleeping so he camped out in our floor, but Savannah was sound asleep.  

At 3:45 AM this morning, I heard Savannah scream out in her room. She was very upset.  By the time I made it out of bed, she had met me in the hallway.  I asked what was wrong, and I thought she said, "I have fallen out of my bed."  I figured she had a dream and did not remember where she was so I explained that she had slept on the floor in a pallet in her room.  She said, "No...The crawdad bit me on my finger."  She was trying to show me her "bitten" finger. At this point, I figured she was sleep-walking or something.  I walked her to the bathroom and told her to go to the restroom then I would take her back to bed.  She was not happy with that and said, "NO, I don't want to go to bed...the crawdad bit me!"

She was adamant that something was in her bed and had bitten her.  She said she saw the crawdad, and it was on her finger. Jason was up at this point, and I told him to help me check her bed.  I wanted to make a "show" of checking things out to hopefully calm her down and get her back to sleep.  At this point, we are kind of laughing to ourselves.  (Jason later said that he was afraid she was having a reaction to her antibiotic ear drops and was hallucinating.)  We looked through all her covers and had her set to get up in her bunk.

I looked in the living room, and she was diligently studying the crawdad tank.  She said, "Mom, the crawdad is not in his tank."  I have to admit that I laughed (out loud) this time, but she insisted that it was not there.  I went to help her find it.  IT WAS NOT THERE!

I called Jason in and told him.  He thought we were teasing him and did not believe us.  He checked every hiding place in the tank but no crawdad!  The only thing we could think of was that he got out because the tank filter was no longer vibrating, and he climbed out the open area in the top.  We knew he was in there the previous night because I had mentioned last evening how neat is was to watch him climbing everywhere.  (By the way, he has shed his shell 4 times since we got him a few months ago, and he is getting pretty big - about 4 inches long.)
We began searching the kid's room for our missing crawdad.  Jason finally found him on the opposite side of the room hiding near one of the toy crates.  Of course, Savannah, Jason, and I were all wide awake at this point.  Savannah tried to get to sleep in her bed, but she ended up in our floor.  Jason had to get up for work at 5:00 AM.  Me...I kept thinking about our crazy night of sleep  and occasionally laughing at the thought of our Attack of the Crawdad!

Monday, June 14, 2010

What's for Dinner? - Pico de Gallo

I wanted to include a recipe that I use for Pico de Gallo.  It is a Mexican style relish that is simple to make.  

Pico de Gallo

Ingredients:
1 1/2 cups diced tomatoes
1/4 cup diced red or white onion
1 tablespoon diced hot pepper
1 tablespoon minced garlic
Juice of 2 limes or 1-1 1/2 Tbsp. of lime juice
2 tablespoons cilantro
Salt and pepper, to taste


Directions:
In a bowl combine all ingredients.


Tips for Pico de Gallo:
  1. When I make my pico de gallo, I use whatever onions I have on hand so the white and red onions can be used interchangeably.  
  2. As far as peppers, I usually use fresh cayenne peppers, finely chopped.  Mine are actually frozen left-over peppers from last year's garden. You can also use jalapeño peppers. If you do not have any fresh hot pepper on hand, you can also use ground red pepper or ground cayenne. When I use ground pepper, I only use a dash. You will need to allow it to sit for the ground pepper to dissolve and blend in or you might have a grainier texture.  It only takes a little of the ground pepper to add heat, and it tends to get warmer as it sits for a few minutes, so use it carefully. 
  3. As far as the cilantro, this is a great time to use some of your fresh cilantro.  However, if you you are out of fresh cilantro, the dried (seasoning bottle type) cilantro will work.  Make sure to only use the dried cilantro if you have time for the pico de gallo to sit.  The dried cilantro will have to have time to soak up some of the juices and re-hydrate.  As I mentioned in a previous post, you can use the frozen cilantro in this dish.  While it does not have the crisp flavor of fresh cilantro, I have used it in pico de gallo when I have not had fresh, and it does alright.  Once again, fresh cilantro is the best way to go.
  4. If at all possible, make the pico de gallo in advance.  If it is allowed to sit for a couple of hours, it enhances the flavor because it gives the various ingredients time to blend.  I use our pico de gallo on tacos, fajitas, empanadas, and taco salads.

Sunday, June 13, 2010

Home School - Math Curriculum

One of the hardest things about home schooling is often choosing the right curriculum for you, your family, and your child(ren)'s style of learning.  Before I began home schooling, I was an elementary school teacher.  When you are in a classroom, you are told what you are going to teach, what you are going to use, and pretty much when you are to use it.  Home schooling allows the curriculum to fit the need of your individual child.  However, it also poses a big problem especially for beginning home schoolers because there is such a vast array of choices that are offered, and it often becomes overwhelming.  


This is how I felt when I began home schooling.  It was to be bable to get advice and pick and choose what I wanted to do by looking at other home schooler's items and listening to their various experiences.  But no matter how many years I home school, I find myself re-evaluating my curriculum in order to find out what I like and do not like, to see what works with each of my children (because they are both VERY different learners), and to keep up to date on what is new out in the home schooling world (or at least new to me).  I am always trying to make learning more exciting not only for my children but for me, too!  No one wants to spend the day studying something that they absolutely hate.  So, it is my job/challenge to try to find ways to make studying the less than exciting subjects more exciting and applicable to life. 


One curriculum that am thoroughly impressed with is Miquon Math by Lore Rasmussen and published by Key Curriculum Press.  It is an excellent math series. I began using the Miquon series upon the suggestion of another home school mother.  I was skeptical at first and only bought one book just to try it out.  Now, I have taught the complete 6 book series with my first child and am set to begin the 3rd book in the series with my son next year. Both of my children have really enjoyed this series, and I am totally sold of this method.  By the end of first grade (orange and red books), my children were both able to divide, multiply, add, subtract, measure, etc...and actually understood the concepts.   


This series is not a memorization based series like so many math books on the market.  It uses critical thinking and hands-on manipulative blocks to teach the concept and not the memorization of an idea.  For example, the multiplication is not taught by memorizing a times table: 5 times 5 equals 25(saying it over and over until you have it memorized)...it is learning that if you have 5, 5's put together, you have a total of 25.  It is demonstrated with a visual approach using manipulative cubes.  This allows them to associate the addition property that they have already learned with the new concept (multiplication) and be able to see the relationship of 5+5+5+5+5=25 being the same as 5X5=25 instead of just memorizing that 5x5=25.  It is amazing to watch the transfer of information when the child realizes that they are multiplying.   


The series is "leveled" by color so you can go at the pace of the child.  Many times parents or children feel pressured or "dumbed down" when they are not using the "grade level" that they should.  The color series helps to eliminate this by taking out the grade level and replacing it with book color: orange, red blue green, yellow, and purple. If your child needs to do one book in one year instead of 2 in order to really learn the information, then you can spread the 6 book series out over whatever amount of time is needed.  The idea is to truly learn the concepts covered in the book so that there is a good foundation in mathematics that the child can carry throughout their life. 


The directions for each "lesson" are found in the Lab Sheet Annotations and Mathematics for the Primary Teacher.  At the beginning of each new section of the book, you will find pages that explain the "hows" and "whys" of whatever the section is covering.  You only have to buy one teacher's book for the entire 6 book series.  (You can view the workbooks and see a sample page at thefollowing link: http://rainbowresource.com/search.php?sid=1276463862-813779.  I have used all of the books mentioned except for the Miquon First-Grade Diary.) 

Each level book covers a variety of basic concepts, and the later books then continue the study of  the concept where the last book left off.  You will have, for example, pages T-1 to T8 in the orange book focusing on length, area, and volume, that will later be picked back up in the green book at T9.  Here is an overview of what concepts are taught throughout the series:


Orange Book:  counting, addition, subtraction, multiplication, fractions, equalities and inequalities, number lines and functions, geometric recognition, length, area, and volume, and clock arithmetic

Red Book:  odd-even, addition, subtraction, multiplication, fractions, division, combinations with addition, subtraction, multiplication, division and factoring, equalities and inequalities, and factoring

Blue Book:  odd-even, addition, subtraction, multiplication, fractions, division, combinations with addition, subtraction, multiplication, division and factoring, geometric recognition, and grid and arrow games

Green Book:  addition, subtraction, multiplication, division,equalities and inequalities, place value, number lines and functions, factoring, squaring, length, area, and volume, series and progressions, mapping, and clock arithmetic

Yellow Book:  addition, subtraction, multiplication, fractions, division, equalities and inequalities, place value, number lines and functions, factoring, simultaneous equations, geometric recognition, length, area and volume, series and progressions, grid and arrow games, clock arithmetic

Purple Book:  subtraction, addition and subtraction combinations, multiplication, fractions, division, equalities and inequalities, squaring, graphing equations, grid and arrow games, clock arithmetic, sets, and word problems


Miquon is a very hands-on learning experience that is fun and stimulates the mind! My daughter still mentions that she loves Miquon and wishes that she could still do it.  My son also enjoys it.  The series is a reasonably priced curriculum that has really worked for me.  The only downer that I have found with the curriculum is that is stops at 3rd grade...I wish there were more for older grades.  

Swagbucks surveys

There is a new way to earn Swagbucks.  Opinion surveys!  In the Swagbucks blog post (on the Swagbucks.com site) on June 8th, Swagbucks announced that they have a new survey site that you can earn Swagbucks through.  If you are a current Swagbucks member, then all you have to do is visit www.swagbuckssurveys.com.

There is a profile link at the top of your information.  You are given Swagbucks for each survey or profile questionaire that you complete. The opinion surveys are about various topics and reward you with varying amounts of Swagbucks.  You are given a brief qualifying survey before you start the actual survey.  If you qualify, the surveys take anywhere from 5 minutes to roughly 45 minutes.  You can look on the chart before you click into the survey and see how much time it is expected to take to complete the survey.  It also gives you a percentage of chance that you have of qualifying for that particular survey based upon the information that you completed in the profile sections.  However, I did a survey last night that said I only had a 5% chance of qualifying, and I qualified.

For those of you new to this blog, Swagbucks is a site that pays you in Swagbucks for searching the internet. If you sign up for Swagbucks, there are various ways to earn Swagbucks that you can then use in the Swagstore to purchase many different prizes and gift cards (like PayPal).  If you are interested in signing up, you can click on the picture link below and it will take you directly to it.  Or, if you would like more information, you can search Swagbucks in my site and it will direct you to other blog posts that I have made on Swagbucks.
Search & Win

While you won't "get rich" taking the surveys, they are fun when you have an extra few minutes to spare.  For those of you with children, there are often surveys that want the kids opinions.  My children really like these.  I am a member of several survey sites and have been completing surveys for about 6 months.  At one of the survey sites, my daughter participated in an interactive survey that paid her $15 for a 45 minute survey.  On that same site, I participated in a survey that paid $25 for a 75 minute survey.  Most of the surveys are about products, commercials, lifestyle habits, etc. that you use in your daily life.  I will try to share some of those sites over the next few weeks.

Thursday, June 10, 2010

Tips for Storing Cilantro

I like to use fresh cilantro in many of my dishes.  It makes the flavor taste so fresh, crisp, and delicious! While I do also use a method of freezing my cilantro that I have left over, I found a way that will allow the "fresh" cilantro to be stored in the refrigerator for about 1-3 weeks (depending on the original freshness) with little to no wilting of the leaves.

First, you choose a fresh bunch of cilantro from the store. Make sure the leaves are nice and crisp. If the leaves are "sagging" in the store already, then they will not last as long at home.  Place the cilantro in a short glass (what we consider a milk and cookies glass) with enough water to cover about 1 inch of the stems. Cover the "glass of cilantro" with a brown paper bag and store the it at the lower back portion of your refrigerator.  But don't forget about it! You will need to change the water at least once a week for as long as you keep the cilantro.

To use the cilantro, take out whatever amount you need and wash in cold water.  Hint: I always wait to wash the cilantro until right before I use it because it makes it easier to store. If you wash the cilantro before storing, you have to make sure the leaves are dry, or they stick together and begin to wilt sooner.

You can use the fresh cilantro in many different dishes or salads.  I use mine for various Mexican dishes, arroz con pollo, pico de gallo, and in my fajitas.  I have also just thrown it (cilantro finely chopped) in a skillet with chicken breasts, salt, and pepper.

If you know that you will not be using the entire bunch of cilantro within a reasonable amount of time, you can also freeze it.  I have already discussed this briefly in another post, so if you have already read this - sorry for the repeat!

In order to freeze cilantro, all you have to do is wash the cilantro and drain it thoroughly.  You can also pat it dry with a paper towel to get as much moisture off as possible.  Cut off the thickest 1-2 inches of the stems depending upon how thick and tough your cilantro stems appear to be.  Finely chop the remaining stems and leaves.  Place in baggies and freeze.  I store mine in 2 Tbsp. servings because that is the amount that I typically use in most recipes.  I usually place each serving in a regular sandwich bag or a fold over bag.  Then, I place all the single servings into a freezer bag to protect it from freezer burn.  When you need cilantro, just pull out however much you need.  However, one thing to note it that you only want to use the frozen cilantro in cooked dishes because it will have lost the crispness that most fresh cilantro dishes need.  I have used frozen cilantro in making pico de gallo, but I prefer fresh.

Cilantro is a great herb that can be used in a variety of ways so give it a try!

Wednesday, June 9, 2010

Homemade Butter with the kids!

Recently, the kids and I were talking about various ways things are made. My son mentioned how butter was made. When my daughter was about 4 or 5, I actually made homemade butter with her. However, I realized that was one experiment that my son had never had the opportunity to have. So, experiment time!

Homemade Butter
Ingredients:
  • One Pint of heavy whipping cream, very cold
  • 1 Mason jar or one of similar size
  • 1-2 marbles
  • lid for the jar
  • 1/8 tsp. salt (optional)
  • a couple of strong arms!
Directions:
Make sure the jar is clean and dry inside and out (you don't want the jar to slip from the hands!). 


 Pour the cold heavy whipping cream into the jar.  


Place marbles in the jar and secure the lid tightly.  


Take turns shaking the jar until the solid butter forms.  


It will take about 15-20 minutes.  


Make sure to open it and look at the various stages of the developing butter to see the changes it is going through. As the butter begins to form, it will begin to clump more and more.  The butter will begin to separate from the liquid (buttermilk).  


In the next phase, you will actually see the creamy whipping cream begin to form. Keep shaking!  You are almost there.


When you can no longer hear the marbles being bumped around, open the jar and place the butter clump into a dish.  Sprinkle the top of the butter with 1/8 teaspoon of salt (optional) and begin working it with your fingers until all the liquid is worked out.  The picture you see at the right is the finished butter after the buttermilk (below) has been pressed out.


You have to make sure the liquid is worked out of the butter or it will cause it to spoil more quickly.  


Place it on a clean plate and form it as desired.  You can even use a butter mold or a mold of some sort to give it some design!  Store your finished product in the refrigerator.  

Tip:  Do not use a Ragu spaghetti sauce jar.  We tried this time and the marble broke the jar.  However, we have used a Mason jar successfully.  This time we ended up using a Tupperware container after our jar broke...you do have to make sure to hold the lid on the container though because it is not screwed down and wants to "bump" off.

Some ways to use this "lesson":
  1. You can study about animals and how they give us food.  (younger children)
  2. This is a great experiment to demonstrate changes in matter - liquid to a solid.  They can make predictions as to what they think will happen.  They can then figure out why and how the change happens.  You can also re-melt the butter and put the liquid back in and it is changed back into cream again - solid to liquid.  
  3. This is an example of a physical change in matter.  You can use this in a lesson comparing physical and chemical changes.
  4. Work through the Scientific Process/Method: ask a question, research the question, develop a hypothesis, test the hypothesis by conducting an experiment, analyze/ study your data, and state your conclusions.
  5. You can also use this for a history lesson and discuss churning butter or pioneer life.  It can be a part of a study on milk, dairy farms, etc..
As you can see, there are endless possibilities where you can use this experiment.  Or, you can just use it to have fun (which is what we did this time).  You can latch on to teachable moments during the experiment and allow your child to learn through experience and interaction with you.  Most importantly - have fun!

Sunday, June 6, 2010

What's for Dinner? - Little Caesar's Copycat Crazy Bread

We are definitely a bread eating family at our home.  My son and my husband are especially fond of just about any type of homemade bread I make for them.

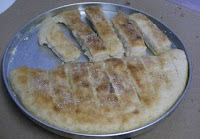
Here is another recipe that our family really enjoys.  It is a copycat recipe for the Little Caesar's Crazy Bread that you buy at most Little Caesar's Pizza restaurants.  We usually have this bread once a week with a pasta dish or along with our homemade pizza.  It is so easy and can be completed from start to finish in about 35-40 minutes!


Little Caesar's Copycat Crazy Bread
Ingredients:
1 cup warm water
1 package yeast (or 2 ¼ tsp. of bulk yeast)
2 tsp. sugar
2 ½ cups Flour
1 tsp. salt
3 Tbsp. Butter
1/2 to 1 tsp. garlic salt


Directions:
Mix warm water, yeast, and sugar together and set aside for 10 minutes until foamy.  
I use my hottest tap water.  You need the temperature of your water to be roughly 110 degrees and no more.  
Add the flour and salt.  Mix well and knead for 4-5 minutes until a nice pliable dough forms.  Set the dough aside for 10 - 15 minutes to rise.  
Flatten the dough in a pizza pan and use a pizza cutter to cut the flattened dough into "sticks" (about 7-8 times across and once the opposite way across the middle).  


Allow the "sticks" to raise for about 10-20 more  and bake at 450 degrees for 6-8 minutes or until golden brown.  


While baking, melt 2 tablespoons real butter (not margarine).  Add ½ to 1 tsp. of garlic salt to the butter (check the taste as you add the garlic to see how garlicky you like it).  


When the bread sticks are removed from the oven, immediately brush them with the garlic butter mixture on the top and bottom.  Then, lightly sprinkle Parmesan cheese on the top.  


Tips:
1.     Real butter is a must for me in order to get that true copycat bread stick flavor.  I have used margarine, and while it is good also, the real butter enhances the flavor much better.
2.     This recipe can also be used as a pizza crust.  Just press the dough into the pan  after the first 10 minute raising time and "decorate" it as you would your favorite pizza.  If you use a 12 inch pizza pan, it will produce a thicker dough.  Or, you can divide it up into a couple of pans or one larger pan.  Bake at 425 degrees until cheese is bubbling and lightly browned.
3.     I use my toaster oven.  It cooks quickly, doesn't heat up my kitchen as much in the summer, and it gives the top a nice browned look.  However, if you use the toaster over, make sure you turn the bread half way through the cooking process. I usually cook the bread sticks for 4 minutes and then turn them to cook for another 3 minutes.  My toaster oven only takes about 7 minutes for the cooking time.
4.     Another great way to raise the bread sticks for the final rise time is to set the bread stick pan on top of the toaster over and allow the heat of the oven to raise the dough more quickly.  The top of my Black & Decker Toaster over gets really warm.  There is just enough room between my oven top and the bottom of the cabinet to be able to provide a nice "proofing" area.
5.     Here's a thought...When you purchase Crazy Bread from Little Caesar's, you spend about $1.29 for an 8 piece bag.  These are so much cheaper to make.  Making them homemade you get a little over twice the amount (about 18 pieces) and pay roughly $.25 to $.30. 
6.     I make a lot of homemade breads at our house whether it be pretzels, doughnuts, bread sticks, or bread rolls.  So, I purchase the bulk packages of yeast at Sam's Club.  It comes in  2 - one pound packages (2 pounds) of yeast for about $4.50.  A one pound package of yeast is roughly 42.66 of the individual packets of yeast that you purchase typically in a 3-pack at most grocery stores.  In essence, I pay approximately $.15 (my would be cost for a 3-pack) for what is typically $.99 -1.29  at the grocery store.  It is a great way to save, and the yeast lasts a long time in a sealed container or Ziploc bag!
Mmm...Mmm...good!

Saturday, June 5, 2010

Mega Swagbucks Day on Monday!

Hey...for those of you who have signed up for Swagbucks, there is a Summer swag give away starting this coming Monday.  You will have 5 chances to earn extra Swagbucks on Monday.  It will be a mega-swagbuck day to kick off the summer.

If you are not signed up and are interested in earning Swagbucks while exploring the Internet, it is easy to join.  I have the Swagbuck toolbar on my Internet Explorer and I have it as my main search engine in Google Chrome.  I just earned enough for another $5 PayPal card (700 Swagbucks each).  The Amazon.com gift cards are also a great deal.  They are only 450 Swagbucks for a $5 Gift Card.

After you have signed up, you can earn additional Swagbucks by referring friends to the site. If you would like to sign up, just click on the link below and follow the instructions!

Search & Win

Wednesday, June 2, 2010

What's for Dinner? - Empanadas

Now that we have the sofrito, it is time to continue on with the empanadas.  Empanadas are a stuffed pastry dish that originated in the regions of Galatia, Spain, and Portugal (thanks Wikipedia!).  The recipe that I am going to post has a ground beef base. However, we have also made a sweeter version using apple filling that was really good.  It reminded me of a fried pie.  The recipe can also be used to make a baked style of empanada to provide a "healthier" version.  However, the recipe that I am sharing today I have only used to fry.

Empandas
First Step:
Dough Ingredients:
  • 3 cups flour
  • 1 tsp. salt
  • 1/2 cup cold water (I add ice cubes to guarantee the water is very cold.)
  • 1 egg
  • 1 egg white
  • 1 tsp. vinegar
  • 3 Tbsp. shortening
  • Oil for deep frying
Directions:
In a bowl, beat the water, egg, egg white, and vinegar thoroughly and set aside.

In a separate bowl, combine 3 cups of flour and salt. Cut in the shortening using a pastry blender or 2 knives.    Make a well in the center of the flour mixture and pour in the liquid egg mixture.  Mix the wet and dry ingredients with a fork until stiff.  Turn the dough out on a lightly floured surface and knead until all the flour is mixed in well.  

Wrap the dough in a plastic wrap and refrigerated at least one hour but not more than 24 hours.  Roll out the dough to 1/8 in thickness and 4-5 inches in diameter.  Add about 2 Tbsp. of meat filling mixture (see Empanada Beef Filling recipe) and seal.  To make the dough stick at the seal, wet down the inner edge with water before crimping.  Crimp the edge of the semi-circle shape using a fork.  

Fry at 350 to 400 degrees until golden in color (about 1-2 minutes on each side).  Empanadas can with be deep fried or pan fried in a shallow skillet of oil.  I find the deep frying much easier and effective for even browning of the empanada.  The recipe makes approximately 10 empanada shells.


Empanada Beef Filling 
Ingredients:
  • 1 pound ground beef
  • 1 Tbsp. of homemade sofrito click here for Sofrito recipe 
  • 1 to 1 1/2 packet of sazon
  • 2 Tbsp. minced green salad olives
  • 1/8 tsp. Adobo seasoning
  • 1/4 tsp. Italian seasoning
Directions:
In a skillet, brown ground beef.  About half way through the browning process, add the remaining ingredients and continue cooking until the meat is no longer pink.  Taste the meat and see if you are happy with the flavor.  If not, you can adjust the ingredients according to your own preference.  

That finishes the empanada!  We serve our empanada topped with lettuce, guacamole, sour cream, and a little additional sofrito.  Jason also likes to dip his in a spaghetti/red sauce.  The picture that did not turn out that great because we were all in a rush to eat.  This is a meal that my daughter requested and could hardly wait to eat so I was trying to snap a quick picture before dinner.
Tips:
  1. You can also purchase sofrito at many grocers that is already pre-made.  However, this sofrito is not as strong in flavor.  If you chose to use the store bought sofrite, you need to add 3 Tbsp. of the sofrito or recaito which is the green pepper version of sofrito.
  2. I often add a bit of salt to my meat mixture to enhance the flavor.
  3. For those of you who do not have Adobo seasoning (you can purchase it at many grocery stores), you can just use additional Italian seasoning.  Or, you can create your own  Adobo seasoning.  Click on the following and the link will take you to a recipe Adobo seasoning -  Adobo seasoning recipe at Recipe Zarr.  
  4. When frying the empanadas, make sure you have the edges sealed.  Also, have a paper towel ready to allow the empanada to drain.
  5. You can keep the already cooked empanadas in a warm (200 degree) oven while waiting for the remaining empanadas to cook.
  6. For left overs, reheat in a toaster over to retain the crispiness.

Tuesday, June 1, 2010

What's for Dinner? - Sofrito

This next recipe is actually part of another recipe that I will be sharing in the next "What's for Dinner?" blog post. It is a sort of relish dish that I learned to make from a neighbor where we used to live.  The lady was a mix of 2 different Latino heritages, and she was a great cook.  She willingly shared her love for cooking as well as several recipes from her families authentic Latino dishes that we enjoy in our family from time to time.

The Sofrito recipe has a variety of different "flavors."  The main base is bell peppers.  So you can vary the flavor of the sofrito according to your preference in peppers.  However, I will tell you that with the mix of ingredients, you hardly know that the final product is mainly peppers.

The following is the recipe as shared with me from my neighbor.
Sofrito
Ingredients:
1/2 tsp. vegetable oil
1/2 green pepper diced
1/2 red pepper diced
1/2 yellow pepper diced
1/2 orange pepper diced
1/2 onion diced
3 cloved of garlic or 1 1/2 tsp. of minced garlic
1 small bunch of cilantro (about 1/4 cup chopped)
Salt to taste
1 Roma or small tomato diced
1/2 packet Sazon seasoning

Directions:
In a frying pan, sauté the peppers and onion in vegetable oil until onions become translucent.  Add in the minced garlic and sauté for 2 minutes.  Remove the pepper and onion mixture from the heat and place in a food processor or blender.  Add the cilantro and chop until a fairly smooth mixture remains.  Add salt, 1/2 packet of sazon, and diced tomato to the pepper mixture and chop again until smooth.  Taste at this time to see if it is lacking in flavor.  Add more salt if needed.  This recipe makes about 1 1/2 cups of sofrito.  

Tips:
1.  I have made this recipe with only green peppers or a mixture of green and red peppers.  It will produce a slightly different taste depending upon the type of pepper you use.  The one I made this last week was with green peppers only (pictured above even though it came out a little blurry).  The red coloring is from the added tomato and the sazon. 
2.  When preparing the cilantro for use in this dish, cut off the thicker portion (about the first 2 inches) of the stem.
3.  Sazon is a seasoning that can be found in the Mexican food section at Wal-mart.  It comes in a box of 10 individual packets for $1.12.  I have also used this seasoning in other dishes just to give it a change of flavor.  It can also be used to make Red Rice (a Guamanian dish using achiote).  Warning:  It has a very red coloring and will stain fingers and white spoons!

I actually like to eat the sofrito right after it is made when it is still warm by itself.  It can be used in a variety of dishes to add a unique flavor.  Next time, I will share one of the recipes that the sofrito is used in...Empanadas.