Welcome to Life at the Holman's.


This blog is my way of sharing some of my thoughts and ideas. As the children age and become independent, I find myself with an empty space. Years of homeschooling and child-rearing focus has transitioned to more time to focus on the things I enjoy. One of my greatest pleasures is cooking. I enjoy making sweet treats for my family and friends and preparing meals that bring a smile to my husband's face. I like finding new ideas that help to make life easier. Enjoy!

Monday, May 31, 2010

Home School Links - Lapbooks

The summer "break" is upon us.  We have finished our regular school year and are preparing to begin our summer fun school activities.  This summer we will be focusing on our Science, Music, and Art subjects.

I find that during the regular school year, we just do not have time in our day to work on these subjects and do them any justice.  A couple of years ago, I decided to do our science in the summer when we were able to actually examine plants and animals and be able to get outside to observe nature and do various experiments.  It worked really well for us, and we had a lot of fun doing it.

During the summer, I try to make school seem like more fun than learning.  It is amazing though how much the kids learn while having fun.  We do fun things during the winter months also, but sometimes it is just hard to find fun in working on a handwriting page in a workbook teaching you how to properly form a cursive "T" or a math page in a text book answering a long division problem...ick!

One of the methods we will use this summer is lapbooking.  Lapbooking is a focused way of studying a topic that is fun and varied in activities.  One of my favorite sites to use is Homeschool Share.  The link is http://www.homeschoolshare.com/.  You can type in just about any subject and find some sort of lapbook activity.  Many follow along with a certain book.


Here are some pictures that we did last year on a lapbook about China.  It revolved around the book The Story About Ping by Marjorie Flack.  It is a great book that both of the kids enjoyed.


I was able to use this lapbook for both JJ and Savannah.  They learned about the rivers of China, counting in Chinese,  as well as other interesting facts about the Chinese flag, ducks and their characteristics, etc. We did this in April of last year.

Sunday, May 30, 2010

Fun in the Sun! - Setting up the Intex Pool

My kids, like many others, love to swim.  My daughter should have been born with fins.  Last year, we purchased a pool pass for our local public pool.  We would go to the pool at least 5 days a week from 1 to 5 pm and swim, and a couple of times, we went to the 7 to 9 pm evening swim.  The kids really enjoyed their time there.  We would take our snacks and just make a day of it.

This year, we realized that because of our schedules, it was just not possible to go to the pool as much as we knew the kids would like.  So, we decided to purchase a small pool.  We went to the store with the intentions of getting the 8 foot by 30 inch Intex pool that was on sale for $25. However, after thinking it over and figuring in the discount that Jason receives where he works, we opted to go with the next size up, and we only paid $66 for it.  It is a 12 foot by 36 inch Easy Set Intex pool. While this is still not a huge pool, we thought it would be great for this year and would allow us to decide if we really wanted to invest in a bigger pool for next year.

This post will take you through our step by step set-up of our pool...Here goes!

We (or rather Jason) leveled us a spot.

Easy Set Intex Pool  12 ft. X 36 in.
All the instruction booklets and an instruction DVD


Out of the box

Lay down the ground cover

Unfold the liner and air up the ring
(We used our vacuum cleaner in the "reverse mode" to air up our ring.) 

Attach the filter
(Make sure the hoses are connected the right way...we had ours backwards at first.)

Fill the pool with 1 inch of water to make sure you are good and level. We were a little slanted (about a half inch to an inch difference), but it did not really mattern in the end.  Also make sure the liner is free of wrinkles on the bottom.

Make sure the openings are all covered (the drain opening as well as the filter openings) and continue filling the pool (Allow your two children who are dying to get in to quietly play in the pool!  The deeper the pool got...the less quiet the kids got!).

Getting closer...


DONE!


I have to say that overall this was a very easy process (at least for me it was...I did not have to do much).  It is a very inexpensive way to have a pool at home for the kids to get wet in.  They have enough room to "swim" around and "dive" for things.  My kiddos have literally spent all day in the pool at this point.
One thing to remember is that your pump has to be "primed" in order to get the air out and allow it to work properly.  There is an air release valve that you just unscrew.  Wait until the water begins coming out of the air valve and then screw it back down to close it again.  This will get all the air out of the pump and the lines and allow the water to flow through.  Also, the 1/2" to 1" off in leveling did not seem to effect the pool.  So, I would just suggest that you have a fairly level area that will not allow the pool to tilt, and an area that is free of any puncturing debris including some really stiff grass areas or roots.

I would definitely recommend this pool (at this point) based on the ease of set up and the inexpensive purchase price.  I will post again further down the road as to how well it holds up and how well the filter works.  

Another Murphy's Gas (Wal-mart Gas Stations) Coupon!

For those of you who signed up for the Murphy Gas E-mail....There is another $3 off of a $20 purchase or more of gas coupon for today and tomorrow!  This is a great deal for just the cost of printing off your coupon.  Also, if you print your coupon on "Draft" then you will save some ink.  The draft or low ink option is usually found in the preferences or option portion of your printing screen.

Sunday, May 23, 2010

Murphy's Gas (Wal-mart Gas Stations) Coupons!

For those of you who have a Murphy's Gas in your area (these are the gas stations that are found at Wal-Mart), they frequently offer discount coupons on gas, diesel, and sometimes sodas.  If you sign up for their e-mails, they will send you an occasional e-mail announcing their deals and often give you an opportunity to print off a coupon.

The coupons are typically for a specific short time frame so make sure you read it.  Today, I printed off a $3 off of a $10 gas purchase coupon that is good today and tomorrow only (May 22nd and 23rd).  If you are interested, here is the link: http://murphyusa.com. All you have to do is visit the link and click on the the image in the upper right hand corner that says "Murph e-offers Sign Up Now!"  to register for their e-mails.

Disclosure:  I am not in any way connected with Murphy's.  I just wanted to pass along this great method of savings!

What's for Dinner? Arroz con Pollo (Latin style Chicken and Rice)

*I neglected to insert the cooking temperature of the oven on the previous post.   You should preheat the oven to 350 degrees (see #4) for the addition.  


In a recent post, I mentioned that we like to buy our chicken in the 10 pound bulk bags and use the legs for fried chicken and the thighs for other meals.  Arroz con Pollo is one of the meals that we enjoy using the chicken thighs in.  


I originally discovered this recipe while watching American’s Test Kitchen on PBS.  Their goal was to take a more difficult version of the arroz con pollo recipe and making it more user friendly and easier to fix.  (You can find their original recipe on their website without all the tweaks that I have done.)   Please note:  I have never made this dish using any other recipe so I have no way of comparing it to the “harder” way.  However, I do know that hard way, easy way…this is a good way!

Arroz con Pollo  

Serve 4 to 6

6

medium cloves garlic , minced or pressed
through garlic press (about 2 tablespoons)
Table salt 
1/2
teaspoon dried oregano 
1
tablespoon distilled white vinegar plus 2 
additional teaspoons for the last step
1/2
teaspoon Ground black pepper 
6-8
bone-in, skin-on chicken thighs, trimmed
of excess skin and fat  (To keep the dish
from becoming greasy, it is important to 
remove excess fat from the chicken thighs 
and trim the skin.)
2
tablespoons olive oil 
1
medium onion , chopped fine (about 1 cup)
1
small green bell pepper , stemmed, seeded,
and chopped fine (about 3/4 cup)
1/4
teaspoon hot red pepper flakes or a dash
of ground red pepper
1/4
cup minced fresh cilantro leaves (2 tbsp. 
reserved for final step)
1
can (8 ounces) tomato sauce 
1 3/4
cups low-sodium chicken broth 
1/4
cup water 
3
cups medium-grain rice (To use long-grain 
rice instead of medium-grain, increase the 
water to 3/4 cup in step 2.)
1/2
cup green olives, pitted and halved
Lemon wedges , for serving

1.  Place garlic and 1 teaspoon salt in large bowl; using rubber spatula, mix to make smooth paste. Add oregano, 1 tablespoon vinegar, and 1/2 teaspoon black pepper to garlic-salt mixture; stir to combine. Place chicken in bowl with marinade. Coat chicken pieces evenly with marinade; set aside for 15 minutes.

2.  Heat 1 tablespoon oil in Dutch oven over medium heat until shimmering. Add onion, green pepper, and pepper flakes; cook, stirring occasionally, until vegetables begin to soften, 4 to 8 minutes.

3.  Add 2 tablespoons cilantro; stir to combine. Push vegetables to sides of pot and increase heat to medium-high. Add chicken to clearing in center of pot, skin side down, in even layer. Cook, without moving chicken, until outer layer of meat becomes opaque, 2 to 4 minutes. (If chicken begins to brown, reduce heat to medium.) Using tongs, flip chicken and cook on second side until opaque, 2 to 4 minutes more.

4.  Add tomato sauce, broth, and water; stir to combine. Bring to simmer; cover, reduce heat to medium-low, and simmer for 20 minutes.  About 10 minutes into cooking this portion, preheat your oven to 350 degrees. 

5.  Add rice, olives, and 3/4 teaspoon salt; stir well. Bring to simmer again.  Then, cover and place pot in oven.  

6.  After 10 minutes, remove pot from oven and stir chicken and rice once from bottom up. Return pot to oven. After another 10 minutes, stir once more, adding 1/4 cup water if rice appears dry and bottom of pot is beginning to burn. Cover and return pot to oven; cook until rice has absorbed all liquid and is tender but still holds its shape and temperature of chicken registers 175 degrees on instant-read thermometer, about 10 minutes longer.

7.  Using tongs, remove chicken from pot; replace lid and set pot aside. Remove and discard chicken skin.  Using 2 spoons, pull meat off bones into large chunks.  Using fingers, remove remaining fat or dark veins from chicken pieces. Place chicken in large bowl and toss with remaining tablespoon olive oil, remaining 2 teaspoons vinegar, and remaining 2 tablespoons cilantro.  Season with salt and pepper to taste.

8.  Place chicken on top of rice, cover, and let stand until warmed through, about 5 minutes. Serve with lemon wedges and/or lemon juice.  

Tips
1.  After tossing the cooked chicken in the vinegar, olive oil, and cilantro, place the chicken on the rice and then cover the chicken and rice and place it back into the previously warmed oven (that is now turned off) to "reheat" the chicken.  


2.  I use my heavy bottomed dutch oven for this meal because I can go straight from the stove top to the over.  Before I had this pan, I would use my large stock pot and have to remove the handles from the sides because they were plastic.  However, I like using this pan because not only it is easier than disassembling my other pan, but I can also use it over 2 burners and be able to cook the meat on one side and the peppers and onions on the other.  


While this recipe is very involved, the most difficult part is the last step when you are trying to de-bone hot chicken.  It is well worth it though.  


We drizzle the top of our individual meal with lemon juice to give it a wonderful tanginess and usually serve lemonade to drink.  You can add a salad and pita bread for a nice addition.  Look for my upcoming homemade pita bread recipe!  

Friday, May 21, 2010

Busy, Busy, Busy

Yesterday, we knew from the get-go that we had a busy day in town.  With living out in the country, we have learned that when you make a trip to town you try to get everything done at once so you don’t have to drive back in.  It is not that we are really that far out, but we drive a big diesel that really likes to eat! 

We started our trip with an 11:00 a.m. dentist appointment and had a multitude of other things we needed to do.  We went to the library, our favorite thrift shops, grabbed lunch at Sonic, and went to the park.  Then, we headed to Wal-Mart for a fast trip in for a few groceries before picking up daddy at work, buying me some shoes, and heading home to cook dinner.  Needless to say, I was exhausted by early evening ready for a good nights sleep.  

However, I must say that we had a really fun time at the park.  Savannah had a really hard time smiling because she had just had a filling put in one of her teeth.  She met a new little friend that she really enjoyed playing with.  


JJ has a new skateboard that he is really enjoying.  We have no pavement near our house so all he has at home is the carpet.  While it is much easier to stand up and try “tricks” on the carpet, it is not much for riding on.  So off to the skateboard park…

Thursday, May 20, 2010

Wow that Oklahoma Weather!

One thing about living in Oklahoma is the amazing weather we experience.  As a child even through my early married life, I was terrified of any sort of storm that even remotely had any wind, lightening, and thunder.  My biggest fear was of their being a tornado in one of those storms.  My favorite place to be was in the basement if there was even a hint of a tornado being in the area.  However, now things have totally changed.

I love to watch the active weather around here.  When there are storms in our area (anywhere in Oklahoma), you can find storm coverage on all 3 of our main news channels.  This really aggravates Jason because the best weather always seems to happen in the evening...right around national news time...and around here, the severe weather comes first no matter what is scheduled on television.  Most of our stations come out of Oklahoma City (the main viewing for almost all of Oklahoma) so we get everyone's weather coverage from the panhandle to the Texas border.  

There is also a very active online “live wire” that you can follow where people are constantly updating and writing in about what is happening in their area during the storms.  The storm chasers will also put in their comments, as well as the meteorologists for the station.  It is really interesting to watch and amazing how they can pretty much pinpoint where the best weather action will take place.  My family makes fun of me because I truly get excited when a storm is happening.  I have the "live wire" blog going on the computer and the three stations flipping back and forth on t.v.   I love watching weather. 

I have seen some of the most impressive lightening storms since living here.  There have been times when we have watched distant storms play out in the clouds with beautiful light displays over the horizon.  You can watch the massive cloud to ground lightening at a distance and see just how "wowing" it is.  A lot of this is probably because it is all open where we live, and you can see for miles.  You can watch as the clouds form and move in for a storm.  You can look off in the distance and see the rain coming and know just about how much time you have before you will get wet.  It will be warm and sunny one moment, and within a half an hour, you are being blown away with 50 M.P.H. cool winds.  (The wind is another phenomenon that I will save for another day.)

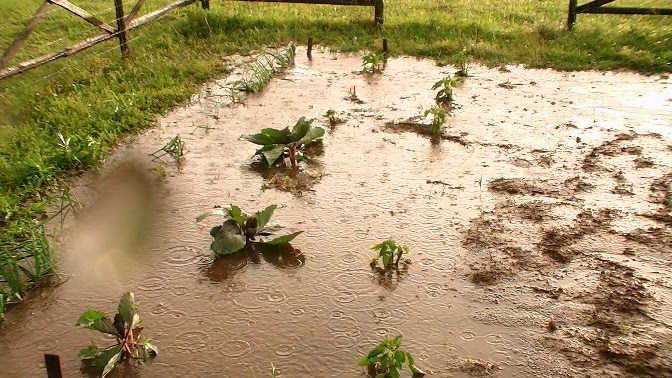
Yesterday, we awoke to a pretty active weather system coming through our area.  The lightening was flashing and the thunder was rolling.  As I lay in bed, I listened to the amazing sound and could almost imagine the lightening sizzling through the atmosphere.  It is truly an awesome sound.  Of course, then came the torrential down pour turning our flat prairie yard into a pond. 

After about 3 hours of rain, the rain stopped and really that was all the storm amounted to.  We went to town and really thought nothing of the overcast cloudy day. 

We arrived home about 5 p.m. and were relaxing in the house.  My neighbor called about 5:30 (about 45 minutes away) and thought she would let us know that there was a tornado coming our way.  Now, to look outside, you would never believe that there was even a storm brewing.  However, sure enough, we turned on the T.V. and here it comes.  We cleaned out our inner closet just in case and waited.  We followed as the news stations said a 1/4 mile tornado was going to go through the middle of Stillwater.  We waited and even as far out as we live could hear the town sirens going crazy.  Finally, we began to feel the wind picking up speed.  We watched as the rain began to fall and the intermittent hail started coming down.  The hail at our house only got up to about quarter-size.  The picture at the top right is one of the bigger pieces of hail that came out of this storm.  Most of this storms hail were smaller.  Hail is another piece of weather that we seem to get a lot of around here.  They have the biggest hail in Oklahoma!  I have actually seen pictures of much bigger Oklahoma hail on the news and online.

For most of the storm, we watched and waited.  The news kept on top of where the storm/tornado was at with live shots from the various anchors that were traveling about.  They constantly warned the people of Stillwater to get to shelter.   The tornado was last really reported in the town of Stillwater near the OSU campus about 5 miles from our house; however, after all the excitement, it never reached us.  

Now…my son and husband were a little disappointed that we did not get to see a tornado.  My daughter had little desire to see a tornado.  Me, well…I got to watch 2 hours of weather and see some great live shots on television that was within 5 miles of my house.  

As the rain continued to lightly fall, the calm weather followed.  The sun could once again be seen in the west shining in the clearing in time for the setting of the day just as if a storm had never been through.  Probably the neatest of all was the full double rainbow (if you click on the photo you can just barely make out the double bow on top of the brighter one)  that was off to the east of our house “following” after the storm.  

Sunday, May 16, 2010

What is it? Wart...corn...boil...

Recently, Savannah had some sort of painful blister looking bump on the outside of her pinky finger.  She had it for a couple of weeks until it became so painful that we had to do something about it.  When she would write, there was a significant amount of pain and rubbing.  We tried covering it with a bandage, but it was still hurting. In the beginning it looked more like a blister, but it seemed to be growing.


Several people that we are acquainted with had looked at it and immediately said..."Oh, that is a wart."  After a few days of significant pain and apparent growth of the "blistered" area, we decided to take her to a doctor.  On the way, we stopped at the library and ran into someone else we knew.  He looked at it and immediately said.."That's a seed wart."    


I took her by Walgreen's to see about getting an over-the-counter wart removal medication.  The pharmacist even looked at it and thought it was a wart.  I called Jason, and we both decided that since we were already in town that I should go ahead and take her to the doctor and have them look at it.  
We went to the "quick care" and were able to get in immediately.  The attending physician looked at it and said it was not a wart.  It was a corn...like the kind you get on a toe.  Confused...yes!  Relieved that we did not treat it like a wart...yes!  He told us it was caused by the pressure from her writing and told us to buy corn pads and keep them on it until it goes down.  He said the only other thing that could be done was to graduallly "sand" it down.  I went to Wal-Mart and bought a pumice stone and some corn pads.  


After about 3 more weeks, the "corn" was still painful and growing.  It was actually growing out of the height of the corn pad.  We decided to see her doctor and make an appointment.  Upon arrival at the doctor, I explained all that had happened since we first noticed the bump.  When I said that the other doctor we had seen said it was a corn, his reaction was "Who told you that was a corn?"  He said it was definitely a wart and needed to come off.  


Then began the painful but quick procedure of removal. This brings us to the main reason I am writing this post.  As we searched and searched online for information or pictures regarding the wart and the removal procedure, we just were not able to find much.  We could not find any information on-line about how long the pain would be after the medication wore off, what kind of pain was normal, or how long the whole "wart removal" procedure would take from start to finish.  At one time the area was red around the rim and looked slightly like it had pus forming.  We could find nothing about the stages after the removal that the wart would go through so here is the way it was for us.


Wart Removal:  The area is first deadened by inserting a needle near the area of the wart.  Warning...the pinky finger area does not have much fat and flesh making it a very painful area to insert a needle.  That was the most painful part of the actual removal process.  Then, the wart is removed and the area is burned off with liquid nitrogen.  That is actually the easy part.  However, once the pain medication/numbing medication wears off, there is an intense burning and pain to the area.  We had not been told to what to expect after the medicine wore off so it was alarming to have that amount of pain for her and not know what we could put on it.  We used ibuprofen to help deaden the pain.  It was very puffy at the site following the procedure and for a couple of days afterwards.  We were told to keep a bandage with antibiotic ointment on it for several days until the blackening area began to diminish. It took a week for the blackening area to start to fade away/come off.  It still hurt for any pressure to be placed on the area or for it to be bumped.  During this time, There were a couple of days that the area had a red rim around it and looked like it had developed some pus in the middle.  (I guess this was normal because it is now healing fine.)  This pain lasted for about a week and a half.  

 It has been 2 weeks tomorrow night since the removal.  The picture shows how the skin is beginning to dry out and heal.  Now the only pain she has is in the deep areas of the site when she presses hard on the area.  The doctor said that there is a 70% chance that he was able to "get all" the wart.  He said there may be possible scaring for about a year.  He also said that the next time we will try to get it removed before it gets so big.  I only hope for her sake that there is not a next time.  

Friday, May 14, 2010

What's for Dinner? - Fried Chicken

Mmm, Mmm, Finger Lickin’ Good…
Fried chicken is one of the meals that I have definitely had to learn over time.  When we were first married, I actually tried to make fried chicken for my husband.  The only real comment he made was, “You know, you don’t have to make fried chicken for me.”  Of course, I knew what he really meant…Please do not attempt this meal again.  I have to admit that it was not very good. 

Several months ago, I decided to start looking for KFC style fried chicken copy-cat recipes.  Of course, with the Colonel’s "secret spices," it was really hard to re-create.  I found several recipes and sort of put them all together to come up with my own favorite fried chicken recipe.  Now my family actually requests fried chicken.  Here goes…
KFC Copycat Fried Chicken
Ingredients:
Oil for frying
1 egg beaten
2 cups milk
2 cups flour
½ to1 Tbsp. salt (add to personal preference)
2 tsp. black pepper
10-14Chicken Legs

Directions:
1.  Combine the egg and milk in a bowl.  Place the chicken in the mixture and allow it to soak for a couple of minutes while you are heating the oil. 
2.  Place about 1 inch of oil in a counter- top electric skillet.  You can also use the stove top and a large skillet.  I just prefer to use the electric skillet because it keeps the heat of the oil regulated.
3.  Heat the oil until it reaches 350°. 
5.  Mix flour, salt, and pepper together in a separate bowl. 

5.  Place the milk-soaked chicken in the flour mixture to coat. 
6.  Place the flour-coated chicken in the hot oil. 
6.  Allow the chicken to fry untouched until you can see it turning a golden brown around the edges (5-7 minutes). 
7.  Once the chicken has begun to brown, turn the chicken and allow to brown on the other side. 
8.  Allow the chicken to cook until the juices run clear, turning it occasionally for even browning (about 25-35 minutes for chicken legs, longer for other larger pieces of meat).
9.  Serve hot with mashed potatoes, gravy, cole slaw, green beans, corn, and homemade biscuits!

Tips:
  • To check the readiness of your oil, toss in a pinch of flour.  If the oil is hot and ready, you can begin carefully placing your chicken in the hot oil. 
  • Make sure you to not turn the chicken too soon or the breading will begin falling off.  You must wait to move the chicken until you see the brown forming. 
  • I usually use the thickest piece of meat to cut into and make sure the meat is cooked all the way through.  
  • If you like the extra crispy style chicken, dip the chicken in the egg mixture a second time and then dip it in the flour again.  This will produce a thicker, crispier breading.
  • Money saving tip: Since my whole family likes fried chicken legs, we purchase the 10 lb. back of chicken from the grocery store (about $6.80) and use the chicken legs for fried chicken and save the thighs for other meals.  We usually end up getting about 12-14 legs in a bag.  A 10 pound bag of chicken can then be spread over 3-4 meals for our family of 4.  It makes for fairly cheap meals!
Some of the actual KFC copy-cat recipes that I found actually have you use a pressure cooker for cooking and tenderizing the meat.  When I first started trying out the various recipes, I did use my pressure cooker.  It does a great job at cooking the meat, and it creates a tender, fall-off-the-bone result.  We still use the pressure cooker method occasionally, but I have found that it has a bit more clean up and must be watched a lot more carefully.  So, while we do enjoy the pressure cooker method, I usually opt for the electric skillet. Below is the directions for cooking the chicken using the pressure cooker. 

Pour oil in to pressure cooker (enough to cover chicken when frying – about 2-2 ½ inches).  Heat the oil to 400 °.  Put 4-5 prepared pieces of chicken in oil and lock lid in place (I have a very large pressure cooker/canner style so I actually do all the chicken at one tine).  Once the steam begins to come through the pressure release valve, set timer for ten minutes.  DO NOT PUT THE WEIGHTED TOPPER ON THE PRESSURE COOKER!  Turn of the heat to the pressure cooker, release the pressure, remove the lid, and take out the chicken to drain.  Make sure you do not leave the chicken sitting in the pressure cooker for too long after you turn off the heat or it will become soggy.