Welcome to Life at the Holman's.


This blog is my way of sharing some of my thoughts and ideas. As the children age and become independent, I find myself with an empty space. Years of homeschooling and child-rearing focus has transitioned to more time to focus on the things I enjoy. One of my greatest pleasures is cooking. I enjoy making sweet treats for my family and friends and preparing meals that bring a smile to my husband's face. I like finding new ideas that help to make life easier. Enjoy!
Showing posts with label baking tips. Show all posts

Saturday, September 7, 2019

Yeasts and Bread Baking

Many years ago, I was making bread and could not figure out why my proof didn't bubble right.  If my memory serves me correctly, I remember talking to my granny about it one day.  Her immediate response was that my yeast was probably dead and she said, "If you ever have yeast that does not foam after it sets, throw it out and start over because it is probably dead, and you will be wasting the rest of your ingredients."  

When dealing with yeast, it is important to realize that it is a living organism.  When you put warm water (or other liquid) into yeast, it activates the "sleeping" yeast and allows it to begin to grow and multiply.  The multiplying is witnessed as a foam that develops on the top of the liquid after a proofing period or as the bread rising.  I won't even attempt to go into the scientific reasoning, but know that yeast is a fungus.  As in all living cells, yeast requires the right environment in which to grow and food in order to multiply.  When making bread, you add the warm water (around 110 degrees) and food (usually sugar to start a proof).  This creates that perfect growing environment.

With that said, there are two main types of yeast that most people will come across in baking. Below is a bit of general yeast information straight from my own kitchen:


Yeasts Directions:
1 packet of yeast = ¼ ounce yeast = 2 ¼ tsp. yeast

To use yeast, you want to make sure your initial liquid is around 110⁰.  If you have water over 110⁰, it might kill the yeast.  I allow my tap water to run to the hottest level, which is about the perfect temperature at our house.  You want the water hot to the touch where you can stand to put your finger in, but it feels hot.

(Regular) Active Dry Yeast: To use active dry yeast, place the initial amount of water/liquid, heated to approximately 110⁰, in a liquid measuring cup.  Add the initial sugar (usually about 1 tsp.) that the recipe calls for along with the yeast and stir.  Allow it to sit for about 5 minutes to become foamy. If the mixture does not foam, then your yeast is not activated and is possibly a “dead” yeast.  You will need to get some new yeast and start over.  You want to have a nice foamy look on the surface of the water to know that your yeast will successfully make bread.  Once the foam has developed, proceed with the rest of the recipe.

Instant Yeast: Instant Yeast (which is what I buy in bulk at Sam’s Club) does not require you to activate it by dissolving before being added to the rest of the ingredients.  It can be mixed in with your dry ingredients directly. To use instant yeast, mix the yeast with about half of the flour the recipe calls for and the sugar (or at least 1 tbsp. of the total amount of sugar called for) together in a bowl.  Add the hot liquid.  Mix until it is incorporated.  Let it sit for 10 minutes to allow the yeast mixture to grow.  Then proceed with your recipe.

For many years now, I have used the instant yeast because it is so much cheaper to buy the yeast in bulk.  I pay $4.50 for 2 pounds of yeast instead of $1.00 for .75 ounces.  At first, I rejected the idea of skipping the proofing step because in my mind that was a necessary part of bread making.  How will I know if my yeast is alive?  

When using the instant yeast for my recipes, I usually only mix in the yeast, sugar (or at least part of the sugar), and about ⅓ to ½ of the total flour the recipe calls for.  I mix this portion together and allow it to sit for 10 minutes or until it is bubbly and partially risen.  So, in effect, this is the initial proofing stage.  This allows me the opportunity to "wake-up" the yeast and to make sure my yeast is alive.  

And once again....if you do not have any response from your yeast whether in actual foam during proofing or in the bubbly, beginning raise, throw it out and start over.

Here are a couple links to some of the yeast bread recipes that I have posted in the past. 

Wednesday, November 16, 2011

What's for dinner? - Ozark Apple Pudding

Mmm...mmm...good!  I was online yesterday and found a recipe for Ozark Apple Pudding.  It was on the website TastyKitchen.com. This particular recipe was in the blog tab in the step-by-step recipes.
 
When we found the recipe, both Savannah and I agreed that it was a must that we try it today. While I would not consider it a pudding as the title would suggest, it is a wonderful apple cake and was so easy to make. There is a step-by-step recipe with pictures here. It smelled wonderful while it was baking and was moist and delicious when it was eaten!

I did a couple of things different.  First off, I used 1 cup of cinnamon flavored apple sauce for one cup of the oil and only used 1/4 cup of oil.  I also left off the nuts...one - we were out of them and two - I am not really crazy about nuts in my cakes, cookies, or breads.

Just a heads up...I also made the coconut granola from the same blog area (here is the recipe).  It turned out alright and would have been much better had I not forgotten it in the oven.  It turned out a little on the brown side but was still pretty good.  The kids enjoyed eating it as cereal with milk on top.
 

Friday, October 22, 2010

Pumpkin Puree

Homemade pumpkin puree is a fairly inexpensive way to enjoy some very tasty goodies.  A few years back, I decided to make my own pumpkin puree for the first time.  I purchased 2 medium size and one large pumpkin for $5 from a local farmer who was selling them in a plaza parking lot.  I took them home, and began preparing them for pureeing.  Of course, we carved all 3 pumpkins before cutting them up for cooking!
2006 pumpkins....soon to be puree!
This year, I decided that I wanted to make my own puree again.  After all, it is not very hard, and the end result is excellent tasting free pumpkin puree.  I began researching how to puree pumpkin.  In 2006, I cut the pumpkin into strips, peeled it, and then cut it up before cooking.  I cooked the pumpkin in the oven on 350 until it was tender.

I decided to "google" how to puree pumpkin and see if there was another way I could puree it (and to help refresh my memory as to how I had previously pureed).  I found some really good illustrated directions at thepioneerwoman.com.  Here is the link to the directions.  She also had a lot of really beneficial ideas.  First, the use of freezer bags that can easily stack and take up less room in the freezer was a great idea for me.  Last time, I used the 16 ounce containers. It works as well, but it does take up more room.   Also, turning the opening of the bag out before putting pumpkin in it really helped cut down on mess when you try to seal the bag.  I did not have the mess around the rim of the bag from putting the spoons of pumpkin in.

I decided to give the Pioneer Woman's method a shot.  Here is what I did this time:
Step-by-step Pumpkin Puree 
  1. Choose your pumpkin.  I chose a larger pumpkin that was on sale at my local supermarket for $3.33 each.  
  2. Preheat your oven to 350 degrees.
  3. Use a butcher knife to cut out the vine topper.  
  4. Let your kiddos remove the "slim" and the seeds from inside.  Save the seeds for making toasted pumpkin seeds!  
  5. Cut the pumpkin in half from the stem to the bottom and around.  Use a metal spoon to lightly scrape all the goo from the inside.  
  6. Cut each pumpkin half into strips and lay the strips on cookie sheets for baking.  
  7. Bake for 45 minutes to 1 hour until your pumpkin is tender.  
  8. Remove from the oven and allow to cool for some time in order to be able to handle it easily.  
  9. Remove the outer skin by peeling it away.  
  10. Cut the cooked pumpkin into pieces and put it in a blender.  
  11. Puree until smooth.
  12. Put 1 cup of pumpkin in each quart freezer bag.  I used a scale to weigh 8 ounces in each bag.
  13. Flatten the bag to remove most of the air and seal the bag.  Lay flat to store in the freezer.
Here is what we ended up with:


16 - 8 ounce bags of pumpkin puree


Seeds for drying


Toasted Seeds - take about 2 Tbsp. melted butter
 and top with salt.  Bake for 15-25 minutes (depending on your oven)  until golden brown
 Tips:
  • While the above method is good and worked just fine, I have to say that I think the other way was maybe a little easier in the long run.  When I peeled the pumpkin and already had it cut into chunks, it seemed to cook faster and more evenly.   
  • I added about 1 Tbsp. of water to a full blender of pumpkin to help it along in the pureeing process.  It just seemed to blend smoother.  
  • 1 full blender of pumpkin chunks for my blender yielded about three 8 ounce servings.
  • I tried to use a food processor (small one), and it did not work very well.  The small food processor was taking too long.  I decided switch to my blender so that it did not take forever to finish.  It also seemed to give a more even consistency.
  • I froze the pumpkin in the 8 ounce portions because that is the amount of half of a small can of pumpkin that you buy at the store.  When I make a recipe, I usually only need 1/2 of the can.  This way I have just what most of my recipes call for.  
  • I placed my completed bags in stacks in my refrigerator freezer in a 9X13 pan to do the initial freezing so that they would freeze flat.
  • The 16 ounce sour cream or butter containers work well for storing the pumpkin in the freezer as well.  They hold the same amount as a small can of pumpkin.
  • I had no idea that cooked pumpkin actually tastes pretty good (sort of like a cross between a squash and a sweet potato) when it is baked.
That is about it.  I look forward to sharing some of the things that we use our pumpkin for in the near future.

As far as cost, here is the break down.  We paid $3.33 for the pumpkin (about 12.5 pounds) and $1.00 for the freezer bags (40 bags for $2.50).  Of course, we did have the propane for our stove, but I have no way of figuring that in. I know that it was not much though.  So...for the extras in gas, we will round up and say that we made 16 - 8 ounce servings of pumpkin puree for roughly $.38 each.  That would result in a can of pumpkin costing about $.76, and  homemade is healthier without all the additives and preservatives.  Plus...the kids had a great time getting slimy!

Then, there is my least favorite part...the clean up!  I would never win the award for "the clean cook."  I like to have a clean kitchen when I start, but I sure seem to get it messy when I am cooking!


1 Small Can Libby's Pumpkin = 15 ounces or 2 of my frozen baggies.  If you typically use a whole can of pumpkin, you can either a freeze a full 15 ounces in one bag to save on bags, or you can fill a sour cream bowl (the kind you reuse from the store when they are empty).  The sour cream/small butter bowl filled almost to the top will equal a small can of Libby's pumpkin (don't fill to the top because you have to have room for freezing and expanding). 

Sunday, September 5, 2010

What's for Dinner - Homemade Apple Pie

I love the smell of a fresh baked apple pie with the apple and cinnamon scents that flow through the house.  It is a great fall smell.  Yesterday while JJ and I were shopping for our Labor Day meal, we found some Gala apples that were on sale.  JJ and I decided that we needed an apple pie to go with our home made ice cream so we bought a couple of bags of apples with the promise of fresh baked apple pie for our cook out.

While there are many different recipes to make an apple pie, I thought I would share the way we make ours here at the Holman house with pictures to follow our adventure.
First, you need to gather the ingredients:
2 cups Flour
1 tsp. Salt
2/3 cups shortening or real butter
6 table spoons of ice cold water
5 Medium apples peeled, cored, and sliced
1 stick REAL butter
about 1 cup sugar
approximately 2 tsp. cinnamon

We begin by mixing the flour and salt together in a large bowl.  Make sure you do not pack down your flour in your measuring cup or you will have too dense of dough which will come out tough.

Next, you add your shortening or butter.  If you are using shortening, make sure it is very cold.  I usually put mine in the refrigerator for some time to make sure it is hardened. Pie crust is a pastry so when you use the very cold shortening or butter, it helps your crust take on a flakier texture.  It allows the fat to stay together when you cut it into your flour leaving "air pockets" when baking.  The idea is that the small solid pieces of fat that are left after mixing will melt under the baking heat.  In effect, it leaves the air pocket behind allowing for a flakier crust.

Cut in your shortening/butter into your flour with a pastry blender until your shortening/butter pieces are pea size or less.  Do not overwork your shortening or you will defeat the purpose of leaving the tiny chunks for air pockets.

Next you add the ice cold water.  When I begin to make the pie crust, I put water in a measuring container with ice cubes to ensure it is really cold. Mix in the water.

This next trick is a big plus for me.  I do not necessarily like the mess of first mixing my pie crust.  So, I actually watched a Martha Stewart video one time and discovered a way to avoid the initial "kneading" of the dough.

Take plastic wrap and spread a large piece on the counter/table.
 After you have the water slightly worked into the dough (where it is still crumbly), pour the contents into the center of the plastic wrap.  Begin folding each side of the plastic wrap into the center and pressing downward.  Continue this process alternating the sides of the plastic wrap until the dough is mixed well.  This brings up another point...when making pastry doughs, another trick to creating flaky layers is to fold your dough over and press down when you are kneading it.

You fold a side, press it down.  Then, take another side and fold it in, repeating the process until the dough looks smooth. This creates "folded" layers of dough.


Again...do not over work your dough, or you will have a tough pie crust.


Ready for the fridge
Next, wrap the dough tightly in your plastic wrap and place it in the refrigerator to allow the worked dough to firm up.


After the dough has set in the refrigerator for a while, take it out and divide it into halves.

The dough actually forms layers


Roll the dough out in a circular form large enough to fit into the pie pan and allowing a slight edge of dough to hang over the top edge of the pan. Make sure you flour your surface well and check it occasionally while you are rolling it out to prevent it from sticking to your counter.

Now, you use your prepared apples pieces to fill your pie pan.  So I will take a break and go over that step.

For the apples, we use our apple peeler, corer, slicer tool.  It is a great tool that we found for a few dollars at a thrift store recently.  It was well worth the purchase...especially if you are one to "put-up" apples in the fall whether it be canning apple butter or freezing apple slices.  This machine takes off the skin, drills through the  core, and leaves you with nice clean even slices of apple.  It also works for pears.  We tried it our on one of the pears from our pear trees in the back field.  While they are not quite ripe enough yet, we were able to see that this tool will work great when we are ready to "put-up" pears this fall.  It beats having to do it with a paring knife!

Back to the pie:


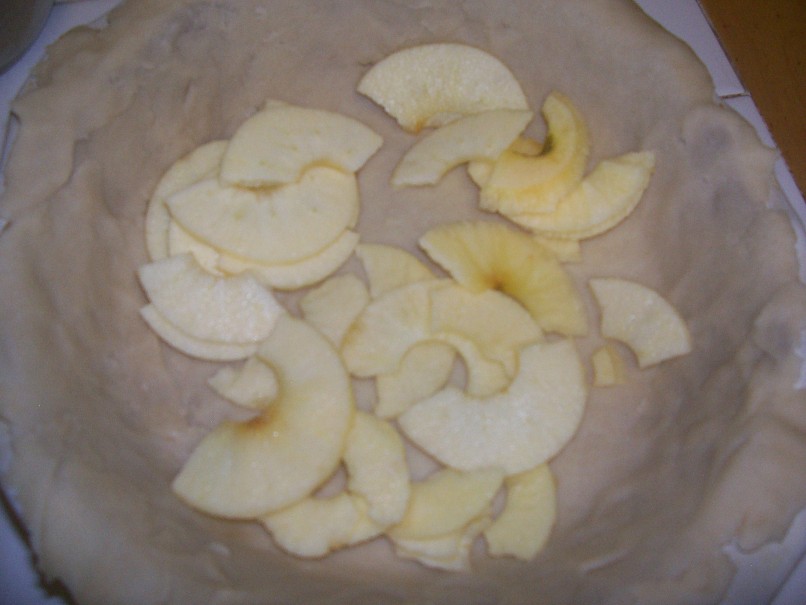
Place the peeled apples in the bottom crust. We used 5 medium apples for our pie.

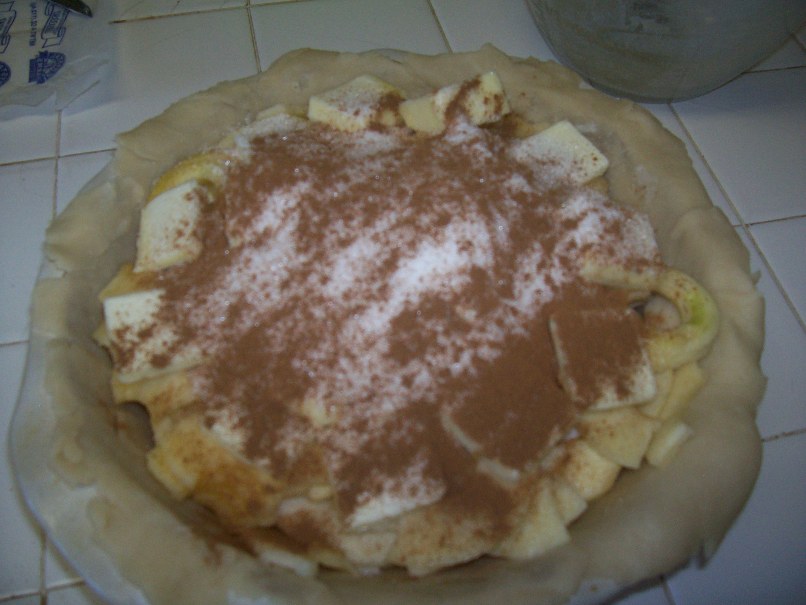
Top the apples with 1 stick of real butter cut into slices.  Add about 3/4 cup of granulated sugar and sprinkle the top with cinnamon.


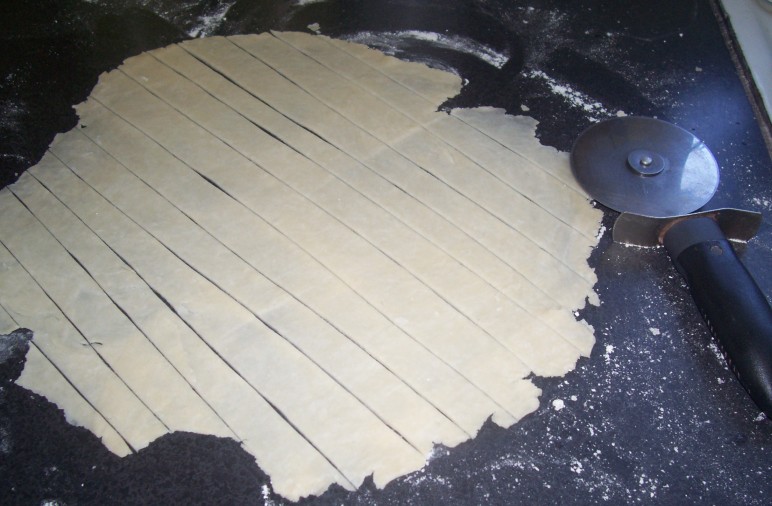
Roll out your remaining half of pie crust.  At this point you can either make a solid topped pie crust and just lay the whole crust piece on top of the pie and press together, or you can make a fancy lattice work topper.  I found a website that has great directions for making a lattice crust (Simple Recipes Lattice Pie Crust Directions).  We like the look of our lattice pies.  I use a pizza cutter to make my lattice pieces. It is quicker and usually allows me to get them more even and straighter.

Next, sprinkle the top of the pie lightly with sugar and bake at 350 degrees until it is light golden brown.

Serve hot with vanilla ice cream!

Wednesday, April 28, 2010

What's for dinner? - Cinnamon Banana Breakfast Cakes

Today I tried a new recipe - Cinnamon Banana Breakfast Cakes. The recipe came from "The Prepared Pantry" online book that I received via email. I was skeptical at first because I have tried so many different banana bread recipes - some good,some bad - that I did not really expect much. However, I was not disappointed. This is by far the best banana bread/cake/muffin recipe that I have ever eaten.

I was planning on making the recipe for breakfast but did not get around to it. Savannah and I decided that we would make it for an afternoon snack. The recipe is as follows:

Cinnamon Banana Breakfast Cakes
Ingredients:
1 cup butter
1 cup sugar
2 large eggs
1 1/2 cups mashed over-ripe bananas (approx.3 large)
1 tsp. vanilla extract
2/3 cup buttermilk
3 cups all-purpose flour
1 teaspoon baking powder
1 teaspoon baking soda
1 teaspoon cinnamon
bananas for slicing
2 Tbsp. melted butter for brushing tops of cakes
mixture of three tablespoons sugar and two teaspoons cinnamon for sprinkling
Directions:
Prepare some baking pans or muffin tins by greasing well and flouring the bottoms or by lining with parchment paper. Large muffin tins work well. Preheat the oven to 350 degrees.
1. Cream the butter and sugar together until light and fluffy. Add the eggs and continue beating. Add the bananas, vanilla, and buttermilk.
2. In another bowl, mix the flour, baking powder, baking soda, and cinnamon together.
3. Add the flour mixture to the butter-banana mixture and fold in.
4. Spoon the batter into the prepared molds.
5. Slice the remaining bananas and arrange them on top of the dough. Use as many slices as desired. (Remember, the dough will expand in the oven while the banana slices will tend to become smaller.)
6. Brush the tops with the melted butter and then sprinkle them with the cinnamon-sugar mixture.
7. Bake at 350 degrees for 30 to 35 minutes depending on the size of the baking molds. A toothpick inserted in the center of the cake should come out clean. Cool on wire racks.

I did not have any buttermilk on-hand so here is a trick...I put about 1/4 tsp. of lemon juice (or you can also use vinegar) in the bottom of my 2/3 cup measuring cup and then filled it the rest of the way with milk. The mixture needs to sit for a couple of minutes to coagulate and make the "sour milk." I use this method with any recipe that calls for buttermilk because I never have it around. You can also buy the powdered buttermilk that you mix in with your dry ingredients and follow the directions on the package. The powdered version can be found at most grocers.
I used part of the batter to fill 12 muffin tins 2/3 full. I had enough left over to make an 8" loaf and a Pyrex small pan of bread. I used previously frozen bananas for the batter and fresh bananas for the topping. I overlapped the banana slices so that when the bread puffed up they spread out nicely. I used Blue Bonnet light margarine in the batter and real butter to brush the tops. It took about 35 minutes for the muffins to cook and about 55 minutes for the loaves to finish baking. The finished product was sweet and delicious. It smelled scrumptious while baking, too!