
Tuesday, August 31, 2010
Another Great Site for Home School
I just wanted to share a wonderful site that I found today while searching for school ideas. It is www.softschools.com. It has a vast array of games, print-ables, learning ideas, etc. for pre-K through middle school. There were several math games that the kids really enjoyed. I even played a math "Pac Man" that was fun. I am just beginning to explore all that the site has to offer because there are so many things to see and do. So check it out and see what you think.
Saturday, August 28, 2010
What's for Dinner? - Easy Buttery Crunch Chicken
Allrecipes.com is a wonderful source for cooking ideas and questions, finding unique recipes, and sharing your own personal experiences. There is a great question and answer forum that I have used many times in the past to find answers to various questions. If you open an account, you can also save recipes that you like or want to try in your own personal "cookbook" area.
The following recipe is a quick and easy dish that I discovered on allrecipes.com. It is called Famous Butter Chicken on their site. Everyone in my family loves when I make this recipe, and it can be fixed with very little time or effort on my part.
Famous Butter Chicken - Easy Buttery Crunch Chicken
Ingredients
Tips:
- I always make more than the recipe calls for (usually 6-8 chicken breast halves for the 4 of us). It doesn't seem to go very far no matter how much I make. JJ absolutely loves this chicken and will eat it until it is gone if we let him.
- I use real butter for this recipe. I have not tried margarine, but I believe it will work as well. We just like the saltier real butter flavor.
- The garlic salt is not detected in this recipe. So, if you have an aversion to garlic, don't worry because the flavor is not strong in it.
- Pour the remaining cracker crumbs over the chicken before adding the butter pieces just to add the extra crunch and prevent wasting the leftover cracker crumbs.
- Lay the pieces/slices of butter directly on top of the chicken. I usually place 2 slices on each piece of chicken (or one if the pieces are small chicken tender size cuts). This seems to distribute the butter more evenly.
Friday, August 27, 2010
Week 3 Homeschool...Finished!
This has been a crazy week at the Holman house. We have been dealing with no Internet, finally having cooler weather, making a trip to Oklahoma City, and adjusting/working with new school curriculum. But, we made it all work and have finished week 3.
As of noon yesterday, we had our Internet back again. Jason was working on a handyman job near the Internet tower that services us. He called me and said he watched the guys climb up the tower, switch out the box, and come right back down. Sure enough, we had Internet immediately. We did lose it briefly this morning, but we are hoping that it was a freak occurrence. I hope that we have truly reached the end of our Internet drought!
This past Tuesday, we finally got relief from our heat wave. We now have beautiful weather...80's in the day, 50's in the night. The windows are open letting in the cool fresh air, and the blankets are piled on at night to ward off the cold air the window fans are bringing in. It is wonderful! The only problem is that now we are not forced to stay inside because of the 105 degree heat, and we would much rather be outside than stuck in the house doing school work.
We did take off on Monday for a trip to Oklahoma City. OKC is our get away from home. While Stillwater is nice, there is not much to do here, so every once in a while we take off for a "trip to the city." We make our rounds to Target, Sam's, the mall, Toys R Us, and sometimes Aldi and then come home. There is not much in the way of shopping in Stillwater so heading off to a variety of stores is like an adventure to us! And...we have to have our Sam's Club pizza and a Coke fix every now and then. The funny thing is that there are a lot more things that we could do in OKC (museums, capitol, Frontier City, etc.), but we just need to see a Sam's and a Target, and we are good to go for a couple more months.
As far as our home school week, Savannah has moved up to the Saxon Math 87. The 76 was "boring" for her, and she asked me if she could move up. At first, I was hesitant because she was making so many "silly" mistakes on the math pages that I was wondering if she was ready. We decided to give it a shot, and sure enough...she is doing much better. She was just bored with all the repeat knowledge and was making careless errors. Even though she is doing much of the same things, this new book is moving much faster and covering more in one lesson than the other book. Next week, we will have a few more lessons of review and hopefully get into some new stuff!
I am also looking into changing up JJ's grammar. The Primary Language Lessons that we have is a little too intense right now, so we are going to back off. We started the year at lesson 50 which is where we left off last year, but I decided to put it off a couple of weeks and do more review of basic sentence structure, main idea and details in paragraphs, nouns/verbs/adjectives, etc. The Primary Language Lessons book does not really do much to actively teach/reinforce basic grammar.
We started today with some games online that deal with sentence structure. Over the next couple of weeks, we will be using some of the activities at www.internet4classrooms.com. This is a great site that offers a variety of activities for each grade level. It has direct links to games and "lessons" that deal with various subject content on the level of your choice. Today, we played "Grammar Blast." I am also starting JJ in the Book 2 writing curriculum that moves into the cursive writing. I think he is ready to jump into the cursive, and he is looking forward to it so we are going to give it a shot.
The Story of the World history book is GREAT! I would highly recommend it to anyone that is ready to start history with their elementary children. It is a great curriculum that follows through like a story. We completed chapter 1 this week. We learned about the shaduf, the fertile crescent, and what the Nomads were. We also finished up our study of archeology. Next week, we have a couple of activities that we will be doing to reinforce some of the nomad ideas, and then we will move on to chapter 2. The kids look forward to it each day, and we sit down together and have time to discuss and enjoy learning together.
Wednesday, August 25, 2010
Ugh! Internet Update
We are still having internet issues. One of the company techs told us that the problem is not our radio after all. It is the new tower radio that they put in. It was 7 weeks this last Tuesday, August 24. We will lose our internet for sure in the evenings. It goes out like clockwork between 8-10 pm and was coming back between 8-10 am the next morning. We were able to use it for the daytime hours, but now it only comes back for minutes at a time. The biggest problem is that when we do have it during the day, it is very slow and sporadic.
For the last 2 days, we have not had any internet at all. The provider has been here a couple of times, and he even had it up and going for a day or so, but then we lost it again. This is still stemming from the lightning strike to the tower on July 7th.
I contacted the company today to see if there was anything that was going to be done or even could be done. I was looking into changing companies, but I wanted to just check the status of our current provider. They called this afternoon to let me know that they have other customers that have our same issue and are fairly certain it is the main radio tower.
Friday, August 20, 2010
What's for Dinner? - Spicy Mexican Chicken Casserole
Tonight for dinner, I was planning to make a chicken and rice casserole. I had purchased a 10 pound bag of chicken and was getting it ready for the freezer. So, my plans were to keep some of the chicken thighs out for dinner. We have a typical chicken and rice casserole that we make (usually in the winter because I don't like use my oven for extended periods of time in the summer). However, the recipe we make is a more bland recipe (not bland in a bad way...just not full of flavor), and I wanted something with a little zing. I decided to use the main idea of our usual recipe and come up with my own recipe style, and it actually turned out really good.
Spicy Chicken and Rice Casserole
Ingredients:
1 can Cream of Mushroom soup
1 can water
1 can Rotel (mild or hot depending on how warm you want to make it)
3/4 cup rice
5 chicken thighs
1/2 tsp. cumin
Salt and Pepper to taste
1/2 cup Mozzarella cheese, Mexican Blend, or Monterrey Jack
Directions:
Preheat oven to 350 degrees.
Place soup, water, and Rotel in a 9X13 pan. Mix together and then add the rice. Mix in the cumin, salt, and pepper. Lay the chicken in the pan meat side down and then turn over. This will put a light coating on the top of the chicken. I actually spooned a little of the mixture on the top of each piece of chicken. Cover the dish with foil and bake for 1 hour. After one hour, remove the foil and top with cheese. Return to oven and back for 15 minutes or until lightly browned.
That's it. It was quick, easy and very tasty. You can add whatever veggies your family prefers. The kids both liked it, and Jason said it was good, too. If it passes the family test...it is a keeper!
Great Deal...Great Fun!
The kids and I made our rounds this week to our favorite thrift stores. While we did not find much, I did make one great purchase...tracing paper. They had a table set out of items that people might purchase for back-to-school. There were pads of artist tracing paper for $.50 each. I thought it might be fun for the kids to try tracing. I realized that they did not have much experience in tracing because it is just not something that I ever thought to do with them.
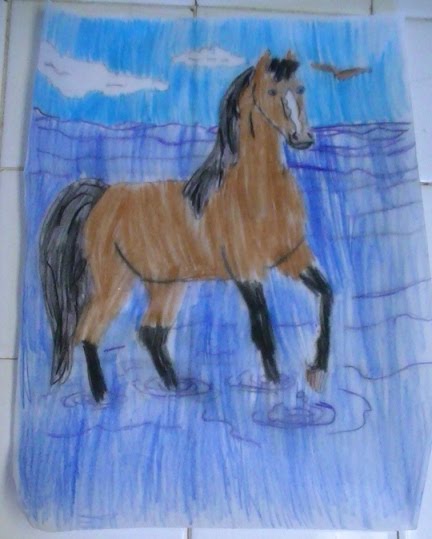
After school today, I decided to let them have a go at it, and they loved it. They got out old coloring books and traced pages of their favorite pictures. I thought they would do maybe one and be ready to move on to something else but no! They traced pictures all afternoon. Here are some of the results:
We used regular pencils to trace the original outlines and colored pencils to shade in the areas.
I know one activity that is found in many beginning handwriting books is having the kids "trace the path." The object is to following the path and stay between the lines. Even the beginning warm up pages in JJ's handwriting book this year had him tracing paths all over a page. This helps teach the coordination kids need to learn to progress to better writing. So, why not have them trace a picture! Great activity for working with pencil control!
After school today, I decided to let them have a go at it, and they loved it. They got out old coloring books and traced pages of their favorite pictures. I thought they would do maybe one and be ready to move on to something else but no! They traced pictures all afternoon. Here are some of the results:
 |
| Savannah's First Page It is a copy of a "fuzzy marker poster." |
 |
| Savannah's Second Page |
 |
| JJ's First Page |
 |
| JJ's Second Page |
I know one activity that is found in many beginning handwriting books is having the kids "trace the path." The object is to following the path and stay between the lines. Even the beginning warm up pages in JJ's handwriting book this year had him tracing paths all over a page. This helps teach the coordination kids need to learn to progress to better writing. So, why not have them trace a picture! Great activity for working with pencil control!
Saturday, August 14, 2010
Spelling Power Vs. Tradition Spelling and other Curriculum
The first week of school is probably one of the hardest weeks because it is so tiring. Getting back in a school time routine takes a lot out of you, and I was mentally exhausted by last night. However, with that said, it was a pretty good week. While we had our ups and downs of trying to keep everyone focused on their work, we made it, and I could already see our "school routine" returning toward the end of the week.
I wanted to take time to introduce both of the spelling books that my kids are using this year. They are two totally different styles of teaching spelling. One is the more traditional weekly spelling list style, and the other is a less familiar style called Spelling Power. I will begin with giving you a run down on Spelling Power. (You can find more information at http://rainbowresource.com/product/Spelling+Power/019940/1281795952-632483. This site gives a great overview.)
Savannah has been using Spelling Power since she was 6 years old, and it has worked really well for her. Spelling Power is produced by Beverly Adams and one of the things that I like most about this books is that you only have to purchase one book for all the school years. This book is designed for ages 8 to adult and has a unique way of helping the student learn their words. The beginning age depends on the developmental level of the child (There is a section in the book that deals with what age/learning level to start using the book).There is a survey test and a placement test that is given at the start of the book that will let you know what level your child should begin at. We actually use this survey/placement test method at the beginning and end of each year to see where we should start in the book as well as what level we tested out at by the end of the year.
The book's word lists are not given as a "word list per week" style. The entire book is divided into various words lists according to the skill that will be studied and then further divided learning levels A-K. These divided lists are called your "flow lists." For example, all of the words in Group 1 throughout the book deal with short a words. Level A-Group 1 covers the easiest short a words, and there are only 10 words in the list. However, Level G-Group 1 will also cover the short a words on a more advanced level.
There are 47 different group rules that are covered throughout the book on the various levels; however, not all the rules are covered in each level. For instance, in Level A, you will cover Groups 1-10, 12-14, 16, 17, 20, 23, 24, 35, and 47. The individual levels only cover the "rules" that the learner should be ready for, such as, Level 1 does not cover Group 15 rule because it is a more difficult rule and is picked up in a later level. (I realize this is a little confusing to try to "read" how the book is set up. The book is actually set up in a very easy to follow way. It is just hard to describe on "paper.")
Each lesson is meant to take only 15 minutes per day. The teacher gives the child words to spell for 5 minutes, and however many words the student can test through in 5 minutes is how many words they have for that day. If there are any words that are missed, the student is taken through a 7 step learning process that helps the child learn the missed words. The student has a sheet (reproducible pages are found in various writing level page sizes in the back of the book) that they fill out to "practice" and learn words they misspelled from that days lesson (the second 5 minute time period). Finally, they participate in a learning activity using the words that they missed. This acts as a reinforcement and a great learning tool for the difficult words. There are many learning activity ideas located in the back of the book. The following day, the teacher/student begins "testing" the list with the previously missed words. When all the words are completed in the group and they have good understanding of the spelling rule, they continue to the next group in the level.
While the book lists a wide variety of activities, one activity that my kids enjoy that is not in the book is shaving cream spelling. You take a can of cheap shaving cream and put a pile of it on the desk/table (hint: make sure you have a surface that will not be affected by the shaving cream ingredients!). The kids spread it out to create a writing surface and use their finger to "write" the dictated spelling words. When the lesson is over, they can just play/create/draw in the shaving cream. It is not just a fun spelling activity, but it also cleans the table and leaves it smelling good! You can also do the same sort of activity using chocolate pudding and an jelly roll/cookie sheet. This a little messier and stickier, but it is fun. The kids get to practice spelling, play in their food, and have a snack all at the same time! Just make sure they wash their hands first!
JJ is using Zaner-Bloser Spelling Connections 3 for 3rd grade. JJ began with Spelling Power last year, and while he had no trouble with the book or the method of learning, I felt that he would benefit with the extra phonics and writing practice that this book had to offer. I purchased this book at the local library book sale this past spring for $0.25 and thought we would give it a try. It uses the weekly spelling list style, and even though he knew most of the words in the list this week and was forced to repeat them each day (which I thought he would hate!), he enjoyed doing the variety of activities. He said he "loved" his new spelling book. I have found that he needs the variety of changing activities in his learning each day or he gets really bored, really quick!
This book focuses on a different idea each day. It is divided into a page/section per day of learning: Day 1 - spelling and thinking which introduces the words, Day 2 - spelling and phonics which introduces the phonics rules that apply to each word, Day 3 - spelling and reading which works on such things as analogies, meaning of words in a sentence, and a complete the story section, Day 4 - spelling and writing which uses various writing activities such as proof reading a letter for misspelled words, and Day 5 - spelling test and vocabulary connections using random words (not words from the list but words that do have the same "rules" as the list) in various reading/vocabulary activities. This book also has the manuscript word with the cursive word right beside it which is helpful in introducing the cursive that we will start in the second semester. There is also a sample sentence for each word. I would compare this book/style of learning to the spelling curriculum that I used when teaching elementary public school.
While I am a definitely a supporter of the Spelling Power method of learning, one must always realize that each person learns in a different way. I have met people who love the Spelling Power method and have told me how well it works (which is how I heard about it in the first place), but I have also met people who said it just did not work for their child. The lady that I purchased my book from was able to use it successfully with one child but not with her second child. Remember to be sensitive to your learner. I plan on going back to Spelling Power with JJ next year. However, that will depend upon him. If he is succeeding and still enjoying his weekly spelling list style, we will adjust our plans accordingly.
Thursday, August 12, 2010
Impromptu Lesson
At some point in the day on Wednesday, the kids were doing their chores. They had been talking and coming up with "inventions." Savannah was working on cleaning the bathroom and had decided that she was going to invent a "No streaks, 4 weeks" window cleaner. She came in telling me how it would work and how great it would be. I decided to use this as a "teachable moment" and do an impromptu activity.
The kids goal was to create an advertisement for their product that would entice the reader of a certain magazine to purchase it. We looked at various advertisements in the Parents magazine and talked about the ways the advertisers specifically targeted parents, families, and kids (for example, the Wal-Mart advertisement focused on selling kids clothes). We discussed why Wal-Mart chose to advertise kids clothes in this magazine. We discussed how Wal-Mart doesn't just sell kids clothes, but the advertiser was appealing to a certain group of readers. We then looked through various other ads and continued our discussion along the same lines while including examples from various styles of magazines. We also talked a little about various propaganda techniques and some of the ads that we have scene on television recently.
Their first step was to create a one page advertisement for their product. It had to have a catchy slogan and a little information that would attract a customer to the product. They also had to design the product. Next, they had to write a business letter/friendly letter to a store owner (me!) talking about their product and asking to meet with them to discuss the possibility of the owner selling the product in their store. Finally, they had to have a meeting with the store owner and convince the store owner to sell their product.
They both spent a lot of time developing their ad. Savannah stuck with her window cleaner idea, but JJ decided to go out on his own and created a new invention to help recycle water. Here are their advertisements...
Savannah advertised her window cleaner. The slogan was "No Streaks, 4 Weeks!" On one side of the magazine page she previewed the product with a picture of the bottle, another slogan using the product name "Twinkles,"and offered the reader a coupon. It also states that it is sold at local retailers.
 She used the back side to encourage the reader further by letting them know how well the product works.
 She wrote a business letter with enclosure. The business letter format was new for her. I did allow her to create make-believe address for the letter and the envelop because she asked if she "could make it up."
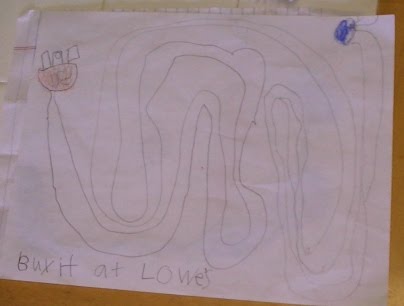
 JJ advertised his "The Helper." It takes your dirty sink water and runs it through a series of pipes and sponges. The idea is that as you run it through various sponges and filters it can come through on the other end somewhere and be used for people who can't afford water. His slogan was "It takes water from your sink and gives others a drink." His cost was $200 per set-up.
 He has the back side continue a diagram of the total piping necessary to complete the project. It is made mainly of white PVC pipe. The back page lets the buyer know that it is available to buy at Lowe's.
 He is working on friendly letters in language arts so we stuck with a friendly letter style. He made sure the store owner knew that they would get half the money on the product.
 We had a lot of fun with the project. They enjoyed using their creativity to make things, and they were learning all the while!
The kids goal was to create an advertisement for their product that would entice the reader of a certain magazine to purchase it. We looked at various advertisements in the Parents magazine and talked about the ways the advertisers specifically targeted parents, families, and kids (for example, the Wal-Mart advertisement focused on selling kids clothes). We discussed why Wal-Mart chose to advertise kids clothes in this magazine. We discussed how Wal-Mart doesn't just sell kids clothes, but the advertiser was appealing to a certain group of readers. We then looked through various other ads and continued our discussion along the same lines while including examples from various styles of magazines. We also talked a little about various propaganda techniques and some of the ads that we have scene on television recently.
Their first step was to create a one page advertisement for their product. It had to have a catchy slogan and a little information that would attract a customer to the product. They also had to design the product. Next, they had to write a business letter/friendly letter to a store owner (me!) talking about their product and asking to meet with them to discuss the possibility of the owner selling the product in their store. Finally, they had to have a meeting with the store owner and convince the store owner to sell their product.
They both spent a lot of time developing their ad. Savannah stuck with her window cleaner idea, but JJ decided to go out on his own and created a new invention to help recycle water. Here are their advertisements...
Savannah advertised her window cleaner. The slogan was "No Streaks, 4 Weeks!" On one side of the magazine page she previewed the product with a picture of the bottle, another slogan using the product name "Twinkles,"and offered the reader a coupon. It also states that it is sold at local retailers.


Great Site for Home School Ideas
I just wanted to share a great site for home schooling and lapbooking. The site is "Dynamic 2 Moms" and is located at http://dynamic2moms.webs.com/. I found this site about a year ago and have really enjoyed following it. They have several examples of lapbooks and ideas that they have done with their children. They also include information for the teacher about the background of the subject. Their most recent post was the Renaissance. It would be a nice addition or a nice add-on to the Michelangelo unit that I just did. (I only wish I would have had it this summer!)
You can find a little bit of everything on the everything from beginning lapbook ideas to home school support to recipes. So, check it out!
You can find a little bit of everything on the everything from beginning lapbook ideas to home school support to recipes. So, check it out!
Monday, August 9, 2010
What's for Dinner? - Fettuccine Alfredo
There are a few rare occasions that Savannah will actually request a specific dish. When she does, I usually try to work it into our weekly menu. One of her recent requests was Fettuccine Alfredo. We eat a lot of pasta dishes at our house...lasagna, spaghetti, muscacholi, etc. However, Savannah has never been crazy about marinara (red) sauce. Alfredo sauce, on the other hand, is one of her favorites. I found a very easy sauce to make.
Alfredo Sauce
Ingredients
1/4 cup butter
1 (8 ounce) package cream cheese
1 teaspoon garlic powder
1 cup milk
3 ounces grated Parmesan cheese
1/8 teaspoon ground black pepper
Directions
Melt butter in a medium, non-stick saucepan over medium heat. Add cream cheese and garlic powder (or fresh minced garlic), stirring with wire whisk until smooth. Add milk, a little at a time, whisking to smooth out lumps. Stir in Parmesan and pepper. Remove from heat when sauce reaches desired consistency. Sauce will thicken rapidly, thin with milk if cooked too long. Toss with hot pasta to serve.
Tips:
- I use fresh garlic for my sauce instead of the garlic powder.
- I usually make ½ of this recipe because this recipe is way too much sauce for us! Even with a half recipe, we have some left over. However, I must also mention that JJ and daddy use half red and half white sauce on our Alfredo meals so this leaves us with some extra.
- This meal is easy to cut in half or double according to how much you need and is fairly hard to mess up!
- Some people like a thicker sauce and others prefer a thinner sauce....you can add milk accordingly to get the consistency that you prefer. If you like it thinner, you may want to add a little more Parmesan, garlic, and pepper to give it a more flavor. Just use trial and error. We like the consistency this recipe provides because it is a middle-of-the-road between thick and thin.
- When you reheat the sauce, add some milk before heating to keep it from "drying out" too much.
- While this is not a cheap sauce with cream cheese costing a $1.50 plus, it is still cheaper than purchasing a jar of store bought Alfredo, and it tastes so much better.
- We usually make Fettuccine noodles with this meal, but it can be used with a variety of noodles. We also sometimes have other optional toppings that can be added like steamed broccoli or pan-grilled chicken pieces (cut a boneless, skinless chicken breast into bite-size pieces and place in a pan with a little olive oil - sprinkle with salt, pepper, and garlic - cook until done). You can also put the noodles, sauce, broccoli, and chicken in a casserole dish 9X13 pan, top it with mozzarella cheese, cover with foil, and bake it until the cheese is melted. Then, remove the foil and lightly brown the cheese for an easy casserole dish. **You will need to add some milk to the casserole in order to keep it from drying out during baking.**
Sunday, August 8, 2010
School Starts Tomorrow!
Wow...so it is finally hear. School starts tomorrow. The kids are actually really excited about the new year beginning. They are most excited about the new history curriculum that we will be using called The Story of the World by Susan Wise Bauer. (I had mentioned this in a previous post.)
The curriculum is a 4 volume set that begins in ancient times with the nomads and then progresses through history. This first volume covers through the Ancient Roman empire and reads like a story which should be beneficial in keeping the kids interested. We will begin the introduction portion tomorrow with the study of what history really is. We will then use the rest of the week to study archeology. I have several books from the library and several interesting sites online that we will be using to supplement our study.
On Friday, I am planning an "archeological dig" in our yard. Of course, I am really hoping that we have a little rain between now and then because the yard is rock hard with the dry, hot spell that we have had for a few weeks now!
Anyway, here is the run down of some of the curriculum we will be using this year. This is mainly a list of what we will be starting our year with. I will add various posts throughout the year of more detailed lessons and books that we are using.
Savannah - 5th grade
- Saxon 76 - This will be our first time using the Saxon curriculum. We used Abeka math for the last 1 1/2 years, but Savannah hated it. We were looking for a good transition for her in switching from Miquon which ended at 3rd grade. Miquon is a great curriculum and she really flourished with it, and she is very good in math; however, the Abeka became a daily dread. It wasn't that it was too hard. It was just very boring in comparison to what she was used to. We did finish it though...much to her dismay! She is excited to start the Saxon. We have both the 76 and the 87 level books. We are going to start with the 76, but most of the book is repeat knowledge for her. While repeating is always good for some things, if it turns out to be no challenge, we will change books. (I purchased both books at a garage sale for $.50 total!)
- Abeka 5th Grade Science - She will be doing a lot of "self-study" this year which will be new for her. We have always done our school as more of a classroom setting, but she is a very self-motivated individual so I am going to keep her with lessons plans that enables her to work at her own pace and allows her to work ahead if she so desires. She has her own lesson plan book that she will be able to complete and check off each day. If she has all of her work completed, she can move ahead in the subject of her choice.
- Reading - During the first 2 weeks, she will get to choose her own book to read and will be writing a short report at the end of 2 weeks. We also are planning an American Girl book as sort of an easing-in-to-school book. Some of the other books I have planned for this year are Shiloh and Anne of Green Gables. She will being doing various forms of book reports and oral reports throughout the year. She enjoys reading so it is usually not a chore for her. I have also decided that by putting most of the book choices in her hands, she will be able to focus on topics that she likes. It is much easier to read and enjoy a book that you are interested in than a book that you don't care for and are forced to read. (That is not to say that she will not have a little "planned variety" by me to help her branch out every now and then! The books do have to meet my approval for her reading level.)
- Intermediate Language Lessons - This is a book that was originally written and published in early 1900's and has been reproduce (2006) for use today. It was written by Emma Serl. It is broken into daily lessons of various activities. This particular book has 301 lessons and can be used for 2 or 3 complete school years. It has everything from dictation and memorization to grammar and writing. I do also supplement with another written grammar/sentence structure book to get in the added grammar practice.
- Spelling Power - Savannah has been using Spelling Power since 1st grade. The book is based upon various levels, and you only test words that the kids miss. For instance, you do a 15 minute spelling lesson a day. 5 minutes of pre-testing. This is when you go through as many words in the current list and see how many they can spell correctly in 5 minutes. It is not a race, just a time limit. Then, the student goes through a designated practice formula that the book sets forth to help them learn only the mispelled words. Finally, they do an activity (teacher's choice) with the missed words. We come up with various activities to help her learn the missed words. There are also activity lists of different games in the back of the book.
- Finallly, we have a few fun books that she enjoys doing a page here and there in.
JJ - 2nd grade
- Primary Language Lessons - This is also a book that was written by Emma Serl. It is designed for students in 2nd and 3rd grade. We began the book last year (in 1st grade), but we took it very slow. About a third of the way through it begins with cursive, and we had not studied cursive yet so that really slowed us down.
- Miquon - We will be doing level 3 (blue) and 4 (green) of Miquon. He has a few pages (about 8) to finish in the red book from last year. He likes the Miquon mainly because it has lots of hands-on learning experiences. It is also a very fast moving curriculum. Miquon has the student multiplying and dividing by the end of the first grade with understanding! The curriculum does a great job introducing math ideas to a child in a way that they understand the process and not just memorize a rule.
- Explode the Code - He will be doing book 6 this year along with the Abeka book A Handbook for Reading. (The Explode the Code series is a great phonics learning program. You can find more about this curriculum at www.explodethecode.com.)
- Handwriting - We will start out the first half of the year with basic writing and proper formation of manuscript letters. Then, we will begin cursive in the second half or the school year. I picked up a few writing curriculum books (3 books total for JJ and one for Savannah) at our local thrift store for $.25 each. However, much of our penmanship focus will be in our daily writing in various subjects so that good penmanship is used through the subjects, not just in handwriting lessons!
- Spelling Connections 3 - This year, I am using a separate spelling book for JJ. He did Spelling Power last year and did fine, but I wanted to try something new with him. It is a book that I picked up at our local library book sale. It is colorful and has various activities in it. However, if it does not seem to work with him we will go back to Spelling Power. Just an experiment!
- Science 2 - This is a book from the Bob Jones homeschooling curriculum (that I also picked up at the book sale for a quarter!). The good part is that both of the kids science books are starting with plants so we will be able to do some learning together!
- Harcourt Trophies - This is the first of several reading books that we will be doing this year. It is a typical public school reading book with various short stories and themes throughout the book. We have a couple of other books that we are planning to follow up with including the Pathway reader Climbing Higher.
- Finally, JJ also has an fun activity book as an extra to his daily work. He will be completing one activity per day unless we have time for more.
That about sums it up. Of course, we will utilize our library a lot throughout the school year. The best part of all is that I really have not had to spend very much money on my books. I keep my eyes open throughout the year for books that I find at garage sales, thrift stores, and retail clearance aisles. I also shop E-Bay or Amazon.com when I have a specific book that I am looking for. I like to find a variety of choices so that when one book/curriculum does not work, I can put it aside knowing that I did not spend too much for it!
Wednesday, August 4, 2010
Michelangelo Lapbook
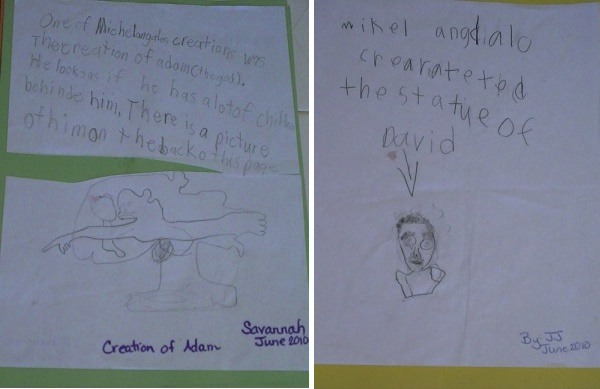
We have finally finished our Michelangelo lapbook. We decided to use construction paper and make it into more of a book rather than using a file folder. Here it is...


In the beginning of the unit, I had the kids get online and find one thing about Michelangelo (below). This was before we had done anything with the unit. It was a great way to introduce them to our new topic. Their job was to find one work of Michelangelo, draw it, and write a brief description about it.
Various Information flap books that we completed throughout the unit

The page below is also showing the closed and open version of the lapbook pages.

Next is a vocabulary page using the book Michelangelo's Surprise. The Duomo and the vocabulary are both flap books.

Michelangelo fact sheet

The bottom portion of the page is a "switch" book. The inside of the book is made of several half sheets of typing paper. The pages are stapled together and cut into 4 sections. The object is to draw a portion of an animal, monster, etc. in each of the 4 sections (example...the head section one, upper body section two, middle body section three, and lower body section four). You have to pre-cut the pages so that the correct section of the picture is in the correct section of the book.

The bottom portion of the picture is a continuous line drawing. The student puts his/her pencil on the paper and begin drawing a person. They can not take the pencil off the page until their picture is completely finished.

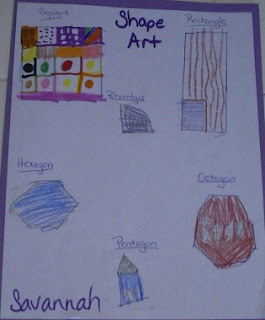
Shape Art


We also used several art books throughout the summer. One book that the kids particularly enjoyed was Discover Great Paintings A Child's Book of Art by Lucy Micklethwait. Throughout the book, the author takes various art pieces and uses an investigative method to study the work. On one page (the left side), the author gives a short paragraph sparking interest in the upcoming piece, then she poses various questions about the work and uses "cut-and-paste" portions of the piece to direct the viewers thinking and turn on their imagination. The opposite page (the right side) then shows the complete art piece and gives the viewer the answers to the previously posed questions as well as other facts about the picture. On the bottom of this page, there is a small information section about the artist and the piece. This book/picture exploration was one of my kids favorite activities.
The final day of our unit was met with putting the finishing touches on our Michelangelo book and watching a movie about the Renaissance from the library entitled The Renaissance for Students: Renaissance Art, Music & Literature. It is one of a 5 part series about the Renaissance put out by Schlessinger Media and can be found at libraryvideo.com.
Just an added note...the templates and lapbook instruction ideas can be found at homeschoolshare.org following this link: http://www.homeschoolshare.com/michelangelos_surprise.php.
Monday, August 2, 2010
Painting and Great Deals!
We recently decided it was time to paint the inside of our house. The kitchen was in great need of painting, and the rest of the house had an interesting array of colors (not bad, just not what we would have chosen)! We are renting, so we have not wanted to spend the time or extra money just to change colors. However, after living here for 2 1/2 years, we decided to go for it.
Jason had built the kids a doll house a couple of years ago, and there was almost a full gallon of yellow paint left over. It is a bright yellow, and we were not sure if it would be too overwhelming in our small kitchen. I also new that the dark country blue that was in our kitchen would need either primer or extra coats of paint to cover it up. So, I began with the bright yellow intending to purchase a softer yellow to finish the final coat. After all, it was not going to cost us anything to get started because we already had the paint.
We also began looking for discounted paint at Lowe's and Wal-Mart. You can get really good deals on the mistint paint as long as you are patient and not extremely picky about color. We found a semi-gloss "Shetland Grey" (which is almost white) for the walls in our kitchen. You can not even tell it has any grey in it unless you hold a bright white up to it. We paid $7.48 for the gallon (half price).
This week while Jason was purchasing supplies at Lowe's for one of his handyman jobs, the kids and I decided to check the paint aisle. We had already looked the week before so I was not expecting much. However, there were 2 gallons of a light beige color (just what I was looking for!), and both were marked at $5.00 per gallon. It is the Valspar Signature Color. When we went to check out, the original price was $35 per gallon. I paid a total of $10.98 for $70 worth of paint, but that is not the best part. When the cashier rang out my purchase, there was a $5 mail-in rebate per gallon that printed out with the receipt. All I had to do was fill out my name and address, pay for a stamp, and put it in the mail box leaving a grand total of 2 gallons of high quality paint costing me $1.42 (tax and a stamp).
We will be painting our whole house for under $15 in materials (when we get the rebate back)! I have almost finished the kitchen. I will post before and after pictures as soon as I am done with each room.
Sunday, August 1, 2010
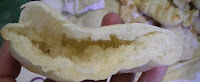
What's for Dinner? Gyros, Homemade Pitas and Tzatiki Sauce
Greek anyone? A gyro is a Greek dish traditionally made of lamb meat (sometimes other types of meat such as pork) that is cooked on a spit, sliced, and served in a pita pocket topped with various toppings of choice. At our house we do not have the big spit to cook a rack of lamb, so we improvise. We use a roast (because it is much cheaper and with the proper seasoning and taste very similar) that has been very thinly sliced/shaved in to strips about 2 inches long. A couple of hours before you cook the meat, sprinkle the meat with the following seasoning mixture and place it in the refrigerator.


 Finally, all you need is to prepare your toppings. We like lettuce, tomatoes, melted and shredded cheese, and Tzatkiki. One of the items that my garden has decided to produce in abundance this year is cucumbers. Tzatkiki is a Greek cucumber sauce that is very easy to make and a great way to use those extra summer cucumbers.


Gyro Seasoning
2 tsp. dried oregano
2 tsp. salt
1 1/2 tsp. onion powder
1 1/2 tsp. garlic powder
1 tsp. black pepper
1 tsp. dried parsley flakes
1 tsp. paprika
1/2 tsp. ground cinnamon
1/4 tsp. ground nutmeg
1/2 tsp. thyme
Combine all the ingredients and store in an air tight container.
Pan fry the meat on high heat in about 1 tsp. of oil until cooked. You can add as much seasoning as you like to the meat. It is more of a taste preference. I also like to sauté bell peppers and onions in another skillet to have as an additional topping.
Second, you will need pita pockets. While we prefer the homemade variety, you can also purchase pita pockets at most local grocery stores. For those adventuresome cooks, here is the pita pocket recipe we use.
Homemade Pita Pockets
1 1/8 cup warm water (110 degrees F)
1 tsp. white sugar
1 1/2 tsp active dry yeast
3 cups all-purpose flour
1 tsp. salt
1 Tbsp. vegetable oil
Directions:

Combine warm water, sugar, and yeast in a bowl and allow to stand for 10 minutes to allow time for the yeast to activate. Mix in flour, salt and oil. Kneed the dough until a smooth dough is formed. Allow to rise for 1 hour or until doubled.
Turn dough onto a lightly floured surface and gently roll and stretch the dough into a 12 inch rope. With a sharp knife, divide dough into 8 pieces.

Roll each into a smooth ball. With a rolling pin, roll each ball into a 5 to 7 inch circle a little over 1/4 inch in thickness. Be careful not to work with the dough too much or it will not "puff" and make the pocket area in your pita. Set rolled pitas aside on a lightly floured counter top and cover with a towel. Let pitas rise about 30 minutes until slightly puffy.

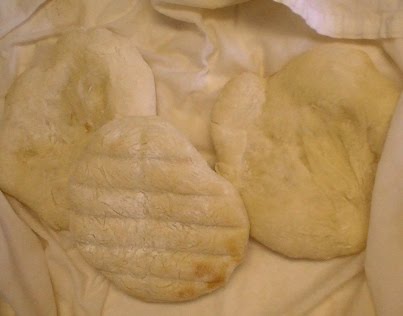
Preheat the oven to 500 degrees F (260 degrees C). Place 2 or 3 pitas on a wire cake rack or cookie rack. Place cookie rack directly on oven rack. Bake the pitas 4 to 5 minutes or until puffed and the tops begin to brown.

Remove from oven and immediately place pitas in a cover them with a damp kitchen towel until soft. (Take a clean dish towel and put it under the water briefly to get some of the towel wet. Then make sure you wring it out and leave it just slightly damp. Lay it out on the table and as you finish each batch of pitas, open the towel and place the new pitas in the stack!)
Once the pitas are softened, either cut them in half or split top edge for half or whole pitas. They can be stored in a plastic bag in the refrigerator for several days or in the freezer for 1 or 2 months.

 Finally, all you need is to prepare your toppings. We like lettuce, tomatoes, melted and shredded cheese, and Tzatkiki. One of the items that my garden has decided to produce in abundance this year is cucumbers. Tzatkiki is a Greek cucumber sauce that is very easy to make and a great way to use those extra summer cucumbers.
Tzatkiki Sauce
16 ounces Plain (not vanilla) yogurt
1-2 cucumbers peeled, seeded, and finely chopped or grated
1 garlic clove, minced
1 Tbsp. fresh parsley
1 Tbsp. Fresh lemon juice
Salt and pepper to taste

Combine all the ingredients and allow to sit for a couple of hours before serving.
Tips:
- When slicing/shaving your roast, slice it partially frozen. A good sharp knife will slide easily through the meat and the mead is more solid so it does not "give way" while you are slicing it and enables you to get a thinner slice.
- If your cucumbers for the tzatkiki are very "liquidy," you may need to drain the cucumbers on a paper towel to get some of the extra moisture out. If not you will have a very watery sauce.
- Also, I do use the dried parsley for my tzatkiki. I just sprinkle about 1/2 tsp. and stir it it.
- Mint and nutmeg are two other seasonings that are commonly used in making the gyros. However, we do not add these seasonings because of taste preference. Just another idea to help change up your flavors if you are particular fond of the mint and nutmeg!
- You can make the pita pockets a little healthier by substituting some of the flour with whole wheat. However, my family does not like the texture of whole wheat so we only make the white unhealthy but good pitas.
Subscribe to:
Posts (Atom)