

While there are many different recipes to make an apple pie, I thought I would share the way we make ours here at the Holman house with pictures to follow our adventure.
First, you need to gather the ingredients:
2 cups Flour
1 tsp. Salt
2/3 cups shortening or real butter
6 table spoons of ice cold water
5 Medium apples peeled, cored, and sliced
1 stick REAL butter
about 1 cup sugar
approximately 2 tsp. cinnamon
We begin by mixing the flour and salt together in a large bowl. Make sure you do not pack down your flour in your measuring cup or you will have too dense of dough which will come out tough.

Cut in your shortening/butter into your flour with a pastry blender until your shortening/butter pieces are pea size or less. Do not overwork your shortening or you will defeat the purpose of leaving the tiny chunks for air pockets.
 Next you add the ice cold water. When I begin to make the pie crust, I put water in a measuring container with ice cubes to ensure it is really cold. Mix in the water.
This next trick is a big plus for me. I do not necessarily like the mess of first mixing my pie crust. So, I actually watched a Martha Stewart video one time and discovered a way to avoid the initial "kneading" of the dough.
Take plastic wrap and spread a large piece on the counter/table.
 After you have the water slightly worked into the dough (where it is still crumbly), pour the contents into the center of the plastic wrap. Begin folding each side of the plastic wrap into the center and pressing downward. Continue this process alternating the sides of the plastic wrap until the dough is mixed well. This brings up another point...when making pastry doughs, another trick to creating flaky layers is to fold your dough over and press down when you are kneading it.
You fold a side, press it down. Then, take another side and fold it in, repeating the process until the dough looks smooth. This creates "folded" layers of dough.
 Again...do not over work your dough, or you will have a tough pie crust.
 |
| Ready for the fridge |
After the dough has set in the refrigerator for a while, take it out and divide it into halves.
 |
| The dough actually forms layers |

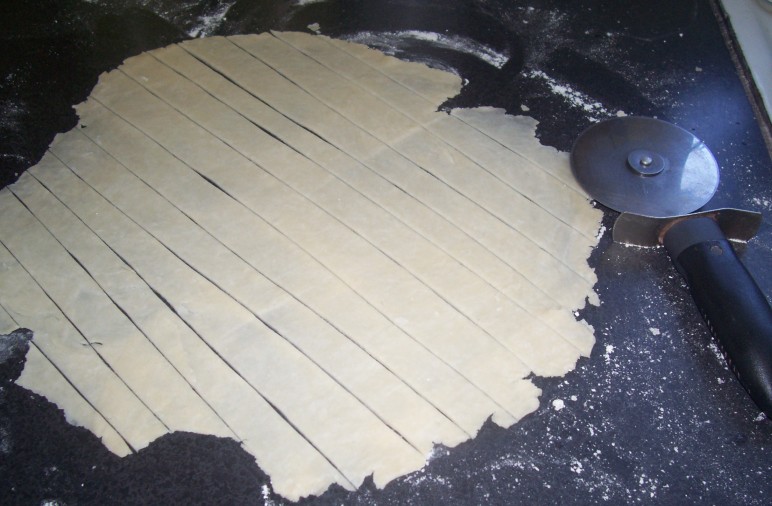
Roll the dough out in a circular form large enough to fit into the pie pan and allowing a slight edge of dough to hang over the top edge of the pan. Make sure you flour your surface well and check it occasionally while you are rolling it out to prevent it from sticking to your counter.
Now, you use your prepared apples pieces to fill your pie pan. So I will take a break and go over that step.

 For the apples, we use our apple peeler, corer, slicer tool. It is a great tool that we found for a few dollars at a thrift store recently. It was well worth the purchase...especially if you are one to "put-up" apples in the fall whether it be canning apple butter or freezing apple slices. This machine takes off the skin, drills through the core, and leaves you with nice clean even slices of apple. It also works for pears. We tried it our on one of the pears from our pear trees in the back field. While they are not quite ripe enough yet, we were able to see that this tool will work great when we are ready to "put-up" pears this fall. It beats having to do it with a paring knife!
Back to the pie:
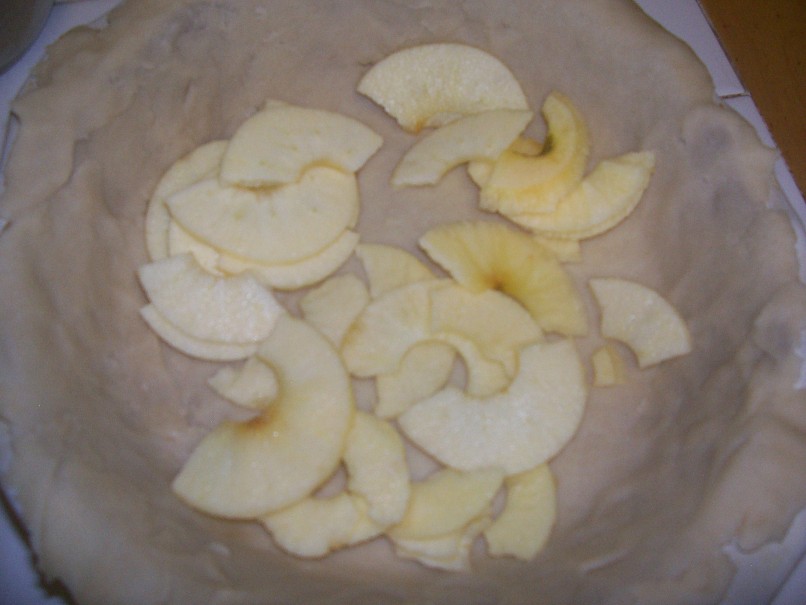

Place the peeled apples in the bottom crust. We used 5 medium apples for our pie.
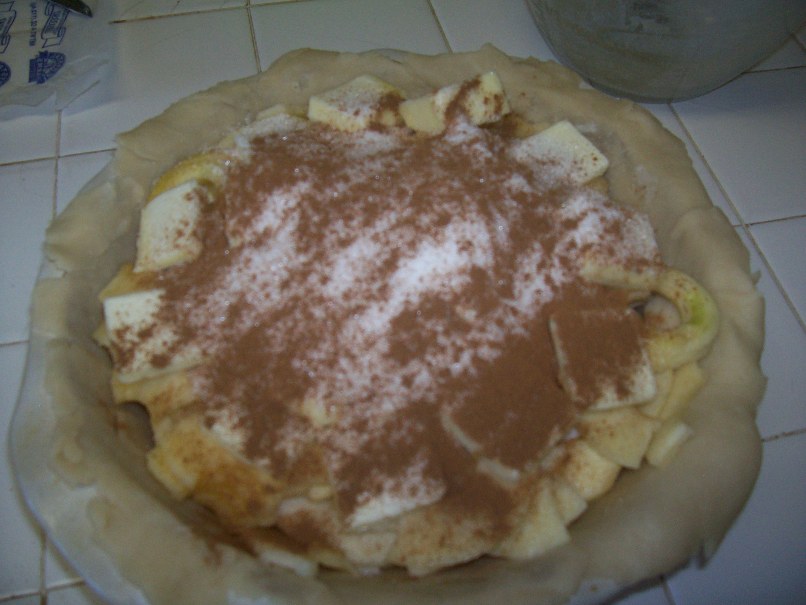

Next, sprinkle the top of the pie lightly with sugar and bake at 350 degrees until it is light golden brown.

Serve hot with vanilla ice cream!


1 comment:
Do you guys have a favorite type of apple for your pies? Your pie looks delicious!
Post a Comment